Xcode is an IDE that is used to develop apps for different operating systems. As we know, we have a lot of different software tools and systems that can be used to develop apps for operating systems like Windows and Linux. On the very another hand, when it comes to developing Mac apps, it is not an easy job. We can easily install any software tool on an operating system like Windows to develop apps on it. But, Mac requires SDK that is Xcode. This is a platform that can be used to develop apps on Mac or iOS. In this post, we will show you how to install Xcode on Windows 10, 8, 7 or Vista PC.
How to Install Xcode for Windows 10/8/7 PC
The problem with Xcode is it is challenging and complicated to install. However, here we will tell you an easy way to install this tool on your machine. You will need some stuff in order to install Xcode on Windows 10,8, or 7 PC.
- Mac OS X Virtual machine
- Intel processor with dual core integrity
- Hardware virtualization
- Xcode application install package
- Memory of the system with at least 2GB
Steps to Install Xcode on Windows Computers
Here you will get to know how you can install the package to your virtual machine in order to get the installation of Xcode completed. You can download the latest Xcode application package from the official site of Apple. All you need is going to the Xcode website, putting your Apple ID and downloading the package. Now if you are ready for the installation process, have a look at this process.
Step 1: You will need to download VirtualBox on your Windows OS running machine. You can easily download this tool from the official website of VirtualBox.
Step 2: After downloading VirtualBox on your system, get OSX Mavericks ISO as a virtual machine.
Step 3: Now open the install VirtualBox on your system. On the top left corner, you will see the New option. Click on it.
Step 4: Here you can create a virtual machine on your system. You will have to enter the Name as OSX, Type as Mac OS X and Version as Mac OS X (32 bit).
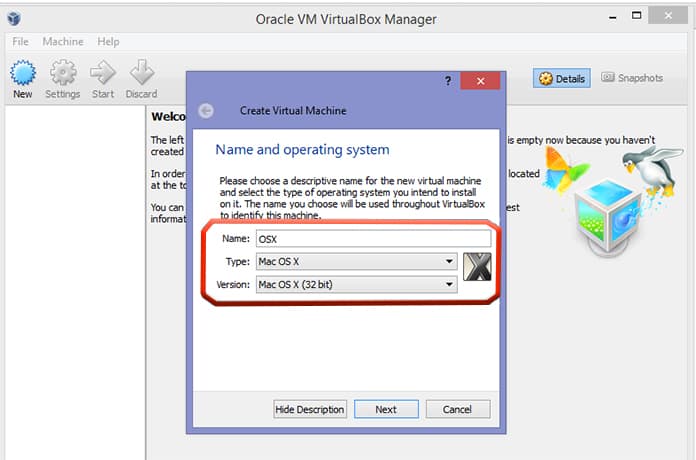
Create Virtual Machine to Install Xcode on Windows 10
Step 5: After putting the necessary information in it, click on next to proceed to the next step.
Step 6: Now you will see Memory Size option. This option allows your system to provide enough Ram to the virtual machine.
Step 7: Select the size as a minimum of 1GB and click Next.
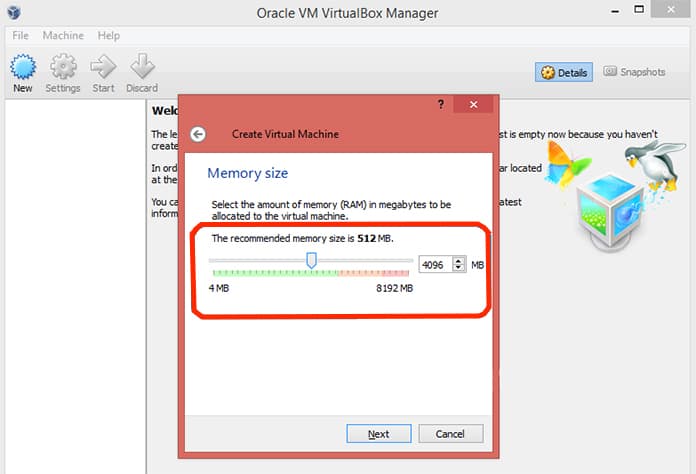
Select the amount of RAM to create virtual machine
Step 8: Now you will see the type of virtual hard drive. Choose the first option named as VDI (VirtualBox Disk Image) and click Next.
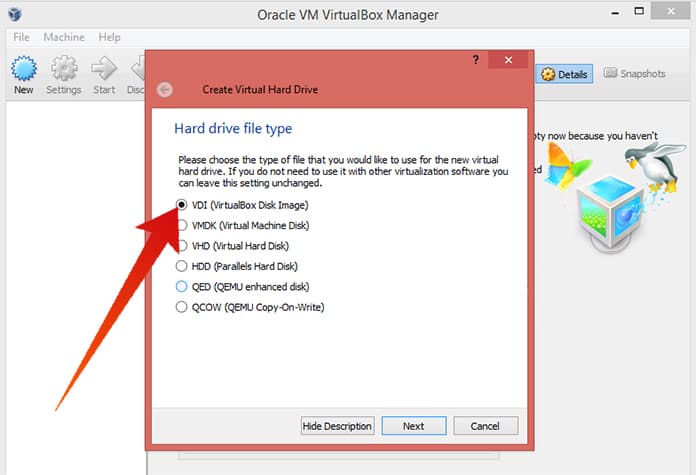
Select VDI to install Mac OS on Windows PC
Step 9: Now select the hard drive space you want to allocate to the virtual machine and click Create.
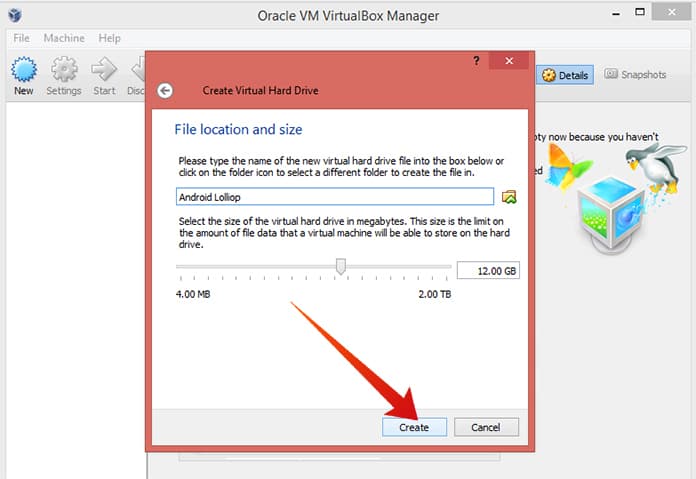
Select HD size to install Xcode on Windows
Step 10: The virtual machine has successfully been created on your VirtualBox.
Step 11: In the head left corner, you will see the Settings icon. Click on it. Now click on Storage then Load iOS File and click OK.
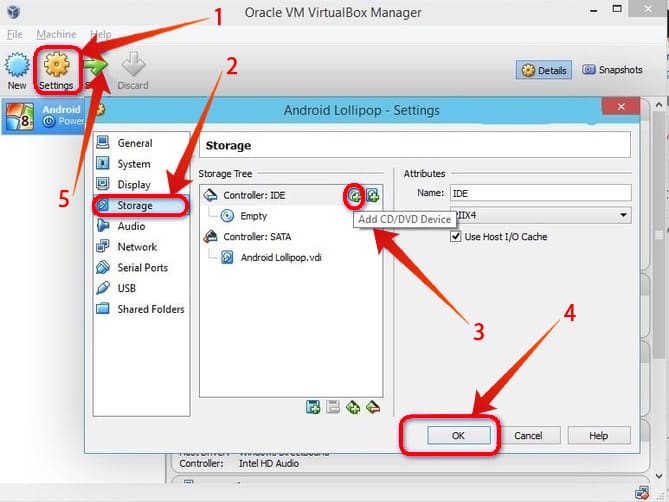
Add storage and Start the MAC OS X Machine
Step 12: After that, you just follow the on-screen steps of OSX boot.
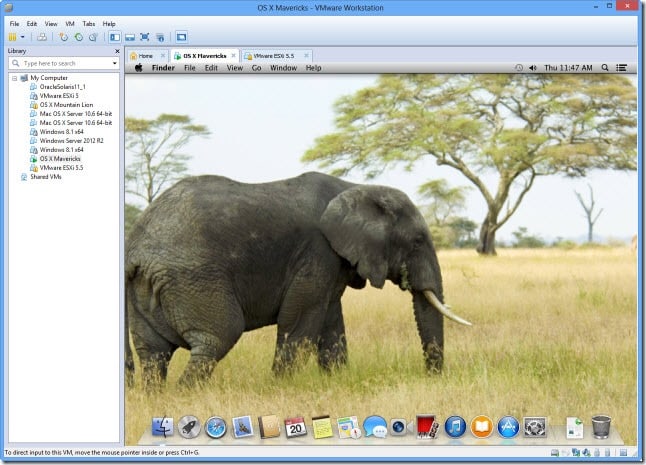
Download and Install Xcode on Windows 10,8 or 7 PC
Step 13: Now open the Safari browser in your VirtualBox and log in with your Apple ID.
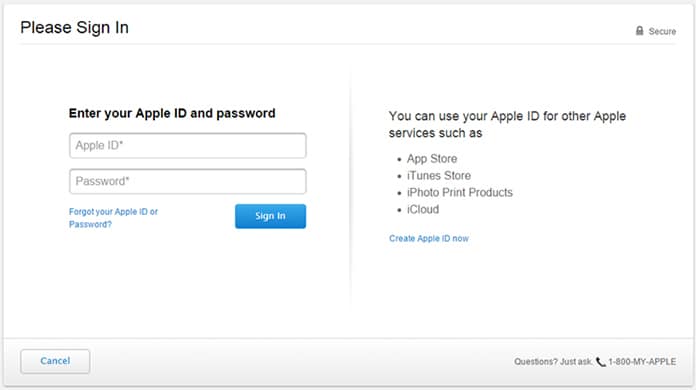
Download Xcode for PC running Windows 10/8/7
Step 14: Type Xcode in the search bar and select the Xcode from the search results.
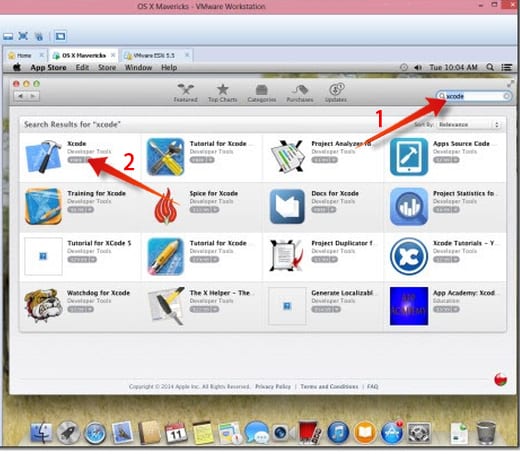
Install Xcode on Windows Computer
Step 15: Provide your name and password there and click OK.
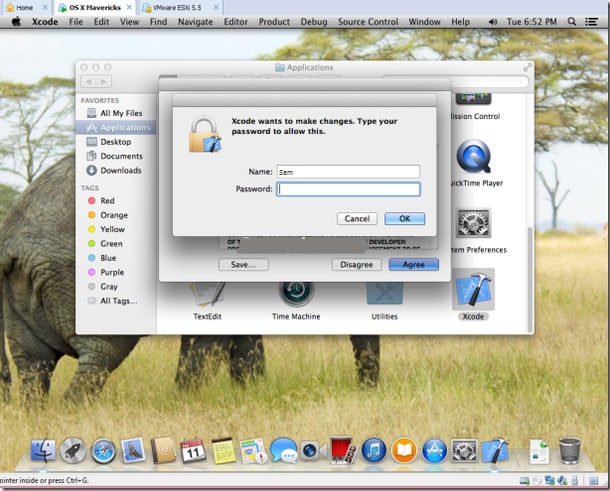
Download and install xcode on PC
Step 16: You are all done! You have successfully installed Xcode on your machine.
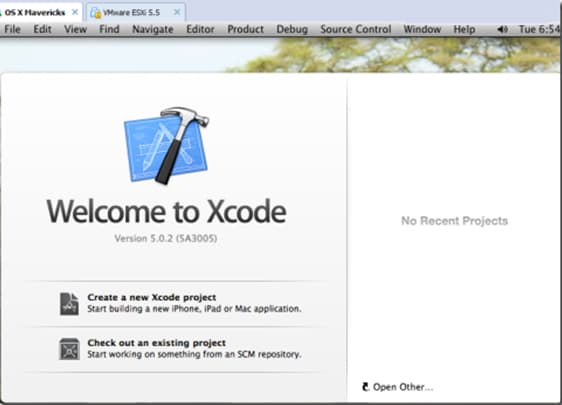
Use Xcode on Windows 7, 8 or 10 PC
You have successfully installed Xcode, app development software on your Windows PC or Laptop. The performance and speed of Xcode won’t be extremely high because you are running this software on Windows, but it can be used for educational purpose. Hope that these steps will help you to install Xcode on Windows 10, 8 and 7 PC.




![30 Best Cydia Repo Sources For iOS 16/15/14 Jailbreak [2024] best cydia sources 2020](https://cdn.unlockboot.com/wp-content/uploads/2020/06/cydia-sources-13-100x70.jpg)