Yesterday, we talked about jailbreak iOS 10.3 status, and also informed you that iOS 10.3 is now available to the public. It has several new features, including Find My AirPods. You also get advanced SiriKit support – bill payments got a whole lot easier, as well as a ride-hailing service in the form of a schedule.
iOS 10.3 can be installed by going to Settings – General – Software update. But if you’re facing an issue with this new version, it’s possible to downgrade iOS 10.3 to 10.2.1 firmware. Also, those who want to jailbreak should keep iOS 10.2.1 installed on their device as it could contain exploits that could result in a jailbreak. Upgrading to iOS 10.3 would reduce your chances.
This post will teach you how to use iTunes to downgrade iOS 10.3 to iOS 10.2.1 – Apple should be signing the latter to make it possible.
Prerequisites to Start the iOS 10.3 to 10.2.1 Downgrading Process
- iTunes should be on the latest version – follow this guide to update it.
- Downgrade should only be intended for iOS 10.2.1 – older firmware is not being signed anymore.
- Create a backup of your content using iTunes and iCloud.
- The process will take some time.
- Make sure Find My iPhone is disabled from Settings -> iCloud -> Find My iPhone.
Note: It’s possible to downgrade iOS 10.2.1 if the firmware is still being signed by Apple. The status could be checked from the ipsw.me website.
Steps to Downgrade iPad or iPhone from iOS 10.3 to iOS 10.2.1
Step 1: Before anything else, download iOS 10.2.1 IPSW file. Make sure the firmware you download is correct and corresponds to your iDevice model.
If the firmware file is downloaded with Safari, you have to ensure that the feature “auto unzip” is deactivated already, or use Firefox or Chrome. Alternatively, rename the .zip file to .ipsw for the process to work.
Step 2: The device needs to be placed in DFU mode. If you own iPhone 7 Plus or iPhone 7, the steps are going to be different. For older models, follow these steps.
- Connect the device to PC with USB.
- Hold down the Power button to switch off your device and slide to power off.
- Press and hold Power button – for 3 secs. Now, without letting go of Power, hold Home button for 10 secs.
- Release Power but continue holding Home until iTunes displays a popup message that the device is detected and is now in Recovery mode. If you don’t see this, attempt process of button holding again.
- Tap “OK.”
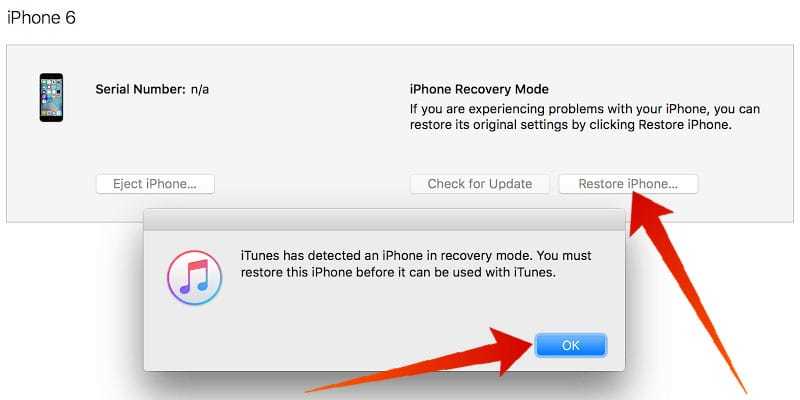
Step 3: Hold the key “Alt/Option” for Mac or “Shift” on Windows and then choose “Restore iPhone… /iPad/iPod Touch…” button.
Step 4: Search and select IPSW file for iOS 10.2.1 – this was downloaded in the first step.
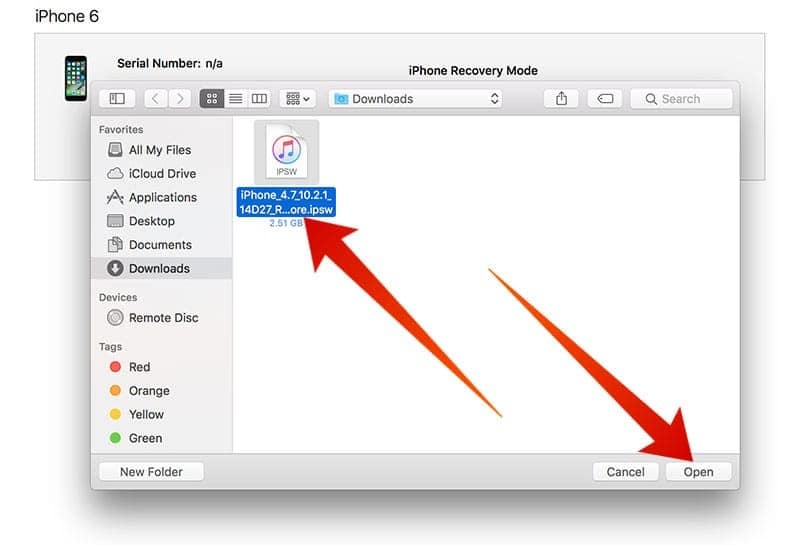
Step 5: Click “Restore and Update” to proceed.
Step 6: In the screen that appears, you’ll see iOS 10.2.1 update details. Click Next -> Agree.
Step 7: iTunes will now proceed with verification and install this software on your iDevice. It will take a while.
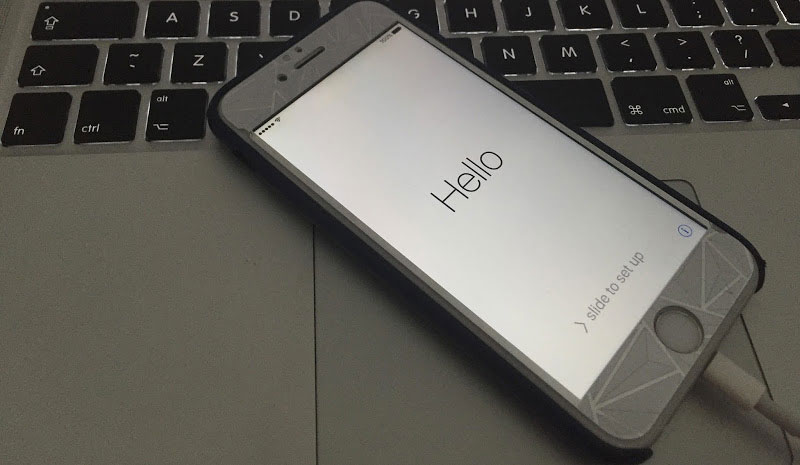
Step 8: After you’ve successfully downgraded from iOS 10.3 to iOS 10.2.1, white screen of “Hello” will show up on your device. Follow the instructions on the screen to set up the device, and restore from the backup you created. Alternatively, you can have a fresh start.
PS. If you get this error “this device isn’t eligible for the requested build” – the wrong firmware was downloaded probably.
Congrats. You were successful in downgrading iOS 10.3 to iOS 10.2.1 – if you have any questions, feel free to ask.


![30 Best Cydia Repo Sources For iOS 16/15/14 Jailbreak [2024] best cydia sources 2020](https://cdn.unlockboot.com/wp-content/uploads/2020/06/cydia-sources-13-100x70.jpg)