There are sometimes when you have to turn your iPhone, iPad into a hotspot. So that you can have WIFI on your laptop. However, you know that you can also turn a Mac into a WIFI Hotspot. There are many such instances when you have to turn your Mac into a WIFI Hotspot.
Such instances can be that you have a poor WIFI reception and your iPhone is facing regular disconnections. You can turn your Mac into a WIFI hotspot to boost the signals or share your internet connection. Elsewhere, if you are only connected to an Ethernet connection and don’t have access to a wireless internet connection. In other scenarios, where there is only limited number of devices that can connect to a router.
Guide to Turn your Mac into a WIFI Hotspot
Sometimes, you need the internet on both devices but have a limited connection, so you can either turn your iPhone into a WIFI hotspot or you can turn your Mac into a WIFI Hotspot. Here we will guide you on how to turn your Mac into a WIFI Hotspot, read below for the steps:
Step 1: Go to System Preferences on your Mac device.
Step 2: Then, choose the option Sharing.
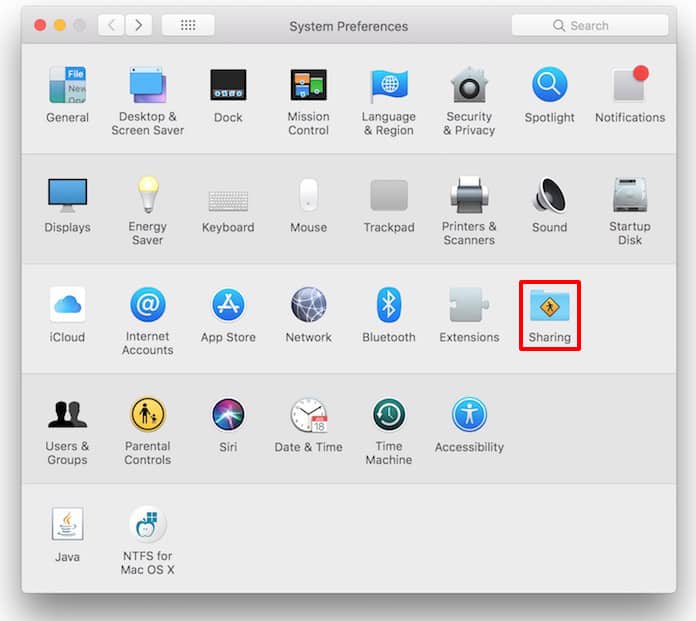
Step 3: Next, you need to check the Internet Sharing. It can be found under the Service tab on the left of the menu. Then, you have to select the option Share your connection from, once selected a menu will pop-up. From that menu you need to choose the option, Ethernet port.
Note: For users with the newest version of Mac, they will have the option Thunderbolt Ethernet.
Step 4: After that, check the option WIFI under Ports from To computer using list, located under the Share your connection from option.
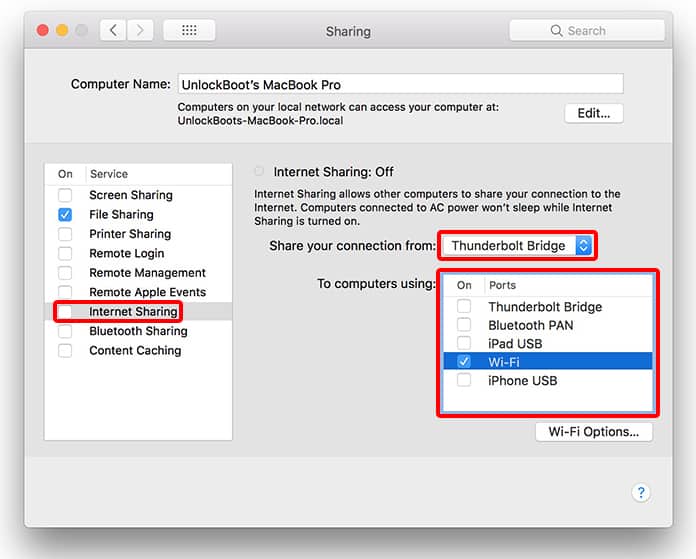
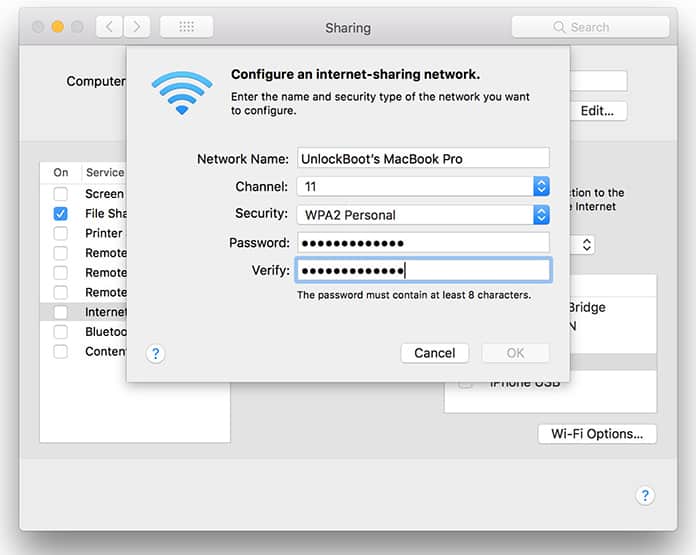
Step 5: Once the above option is checked, you have to click on the WIFI options button, situated below the Ports list. Then a dialog box will pop-open. Here you would need to configure the internet sharing network.
Step 6: To configure the list, enter a Network Name for your WIFI hotspot. Then in the Security drop-down list select the WPA2 Personal option. Just enter a Password and re-enter it again to verify the password. Next, click the OK button.
Step 7: After clicking on the OK button, you will go back to the Sharing screen. Make sure the Internet Sharing option box is checked.
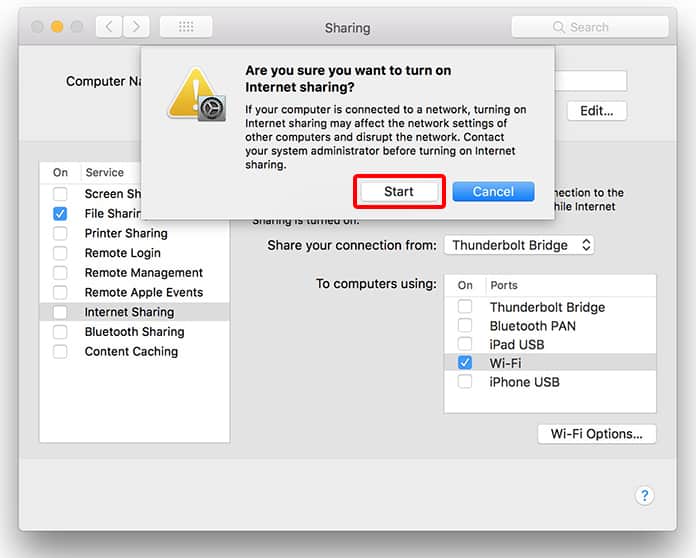
Step 8: A dialog box will open up, which will ask you to confirm the internet sharing option. Here you just need to click on the Start button to turn the Mac into a WIFI hotspot.
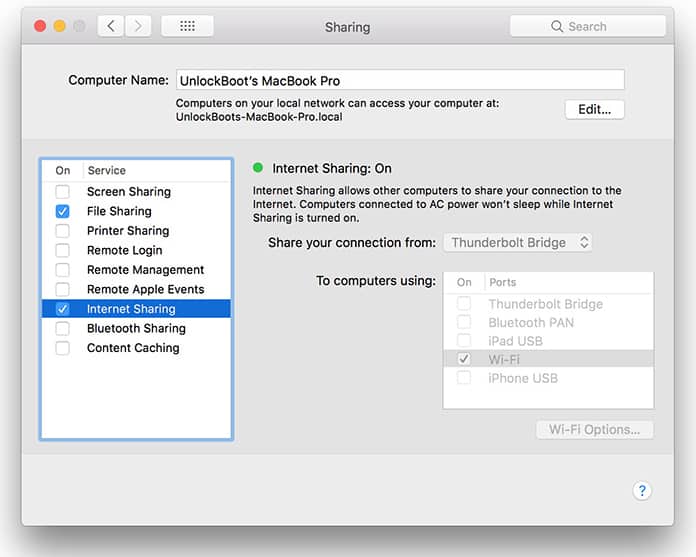
Now you have just turned your Mac into a WIFI hotspot. Just connect your iPhone, iPad or any device with the hotspot and enter the password you had set up in the above steps. To turn off the WIFI hotspot you need to either disconnect your Mac from the WIFI or uncheck the Internet Sharing option.
Let us know in the comments below what are the other scenarios you think that we can use the Mac WIFI hotspot option for?
