It has been widely known that the iPhone is not easy to fix, unless you’re an Apple Genius employee. A few pictures reveal that Apple devices, the iPhone 5c and 5s, are easier to repair for Geniuses.
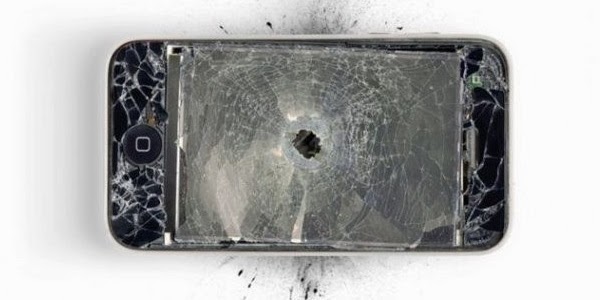
Top iPhone Repair secrets from Apple
The pictures and animations you’re going to is the exact methods used by Apple staff to repair broken devices. The tools include the ones that are kept secret in Apple stores for customer service repairs.
1. Removal of battery
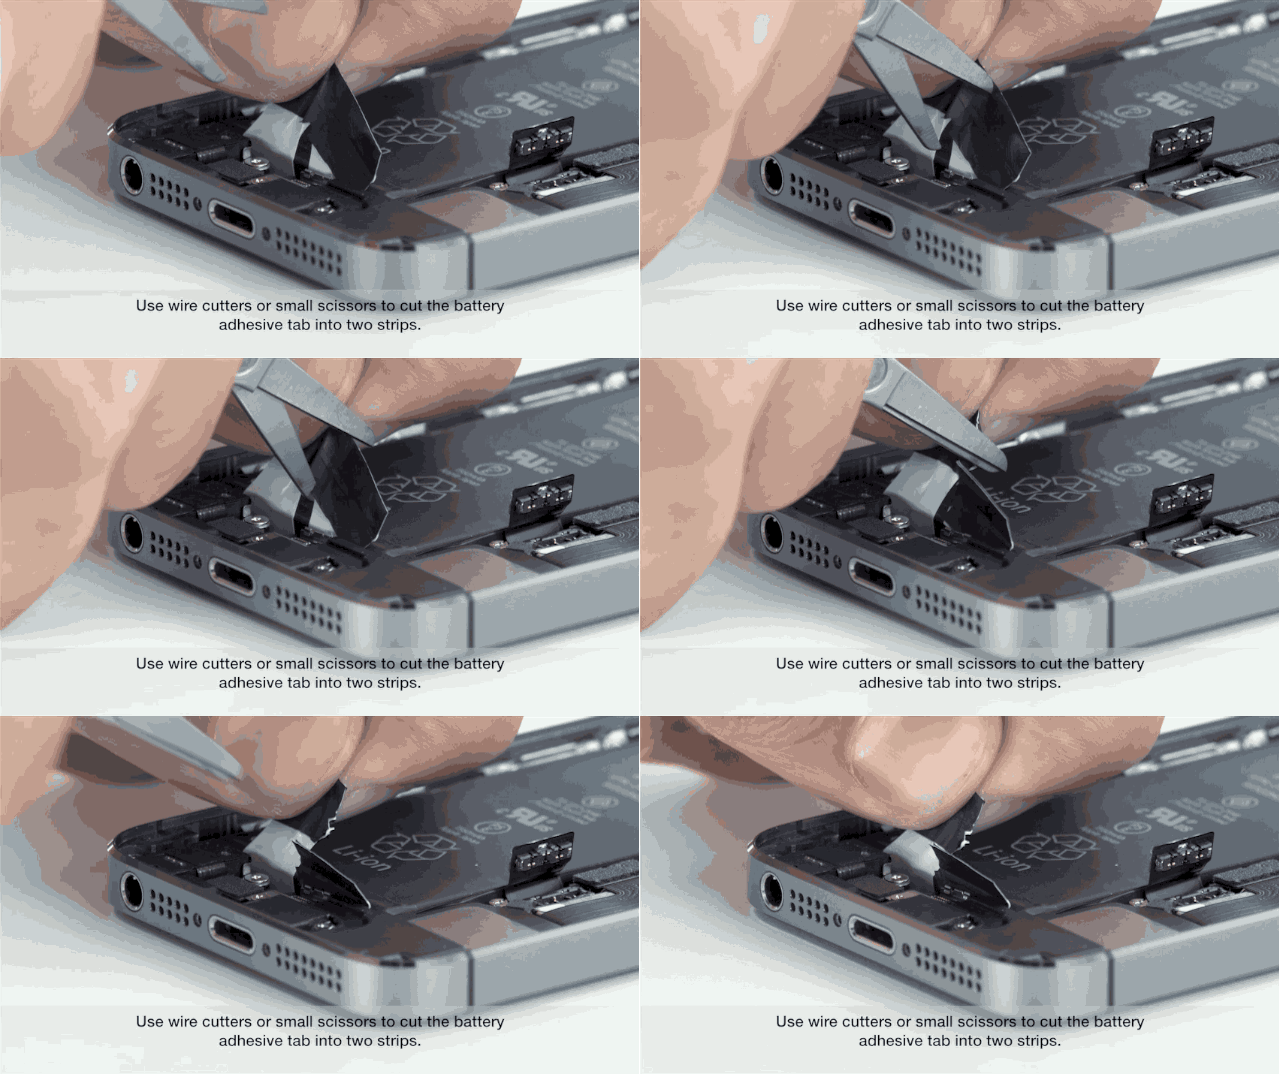
The official guide from Apple says that the strip should be cut with the use of scissors, and then the adhesive beneath should be pulled out gradually.
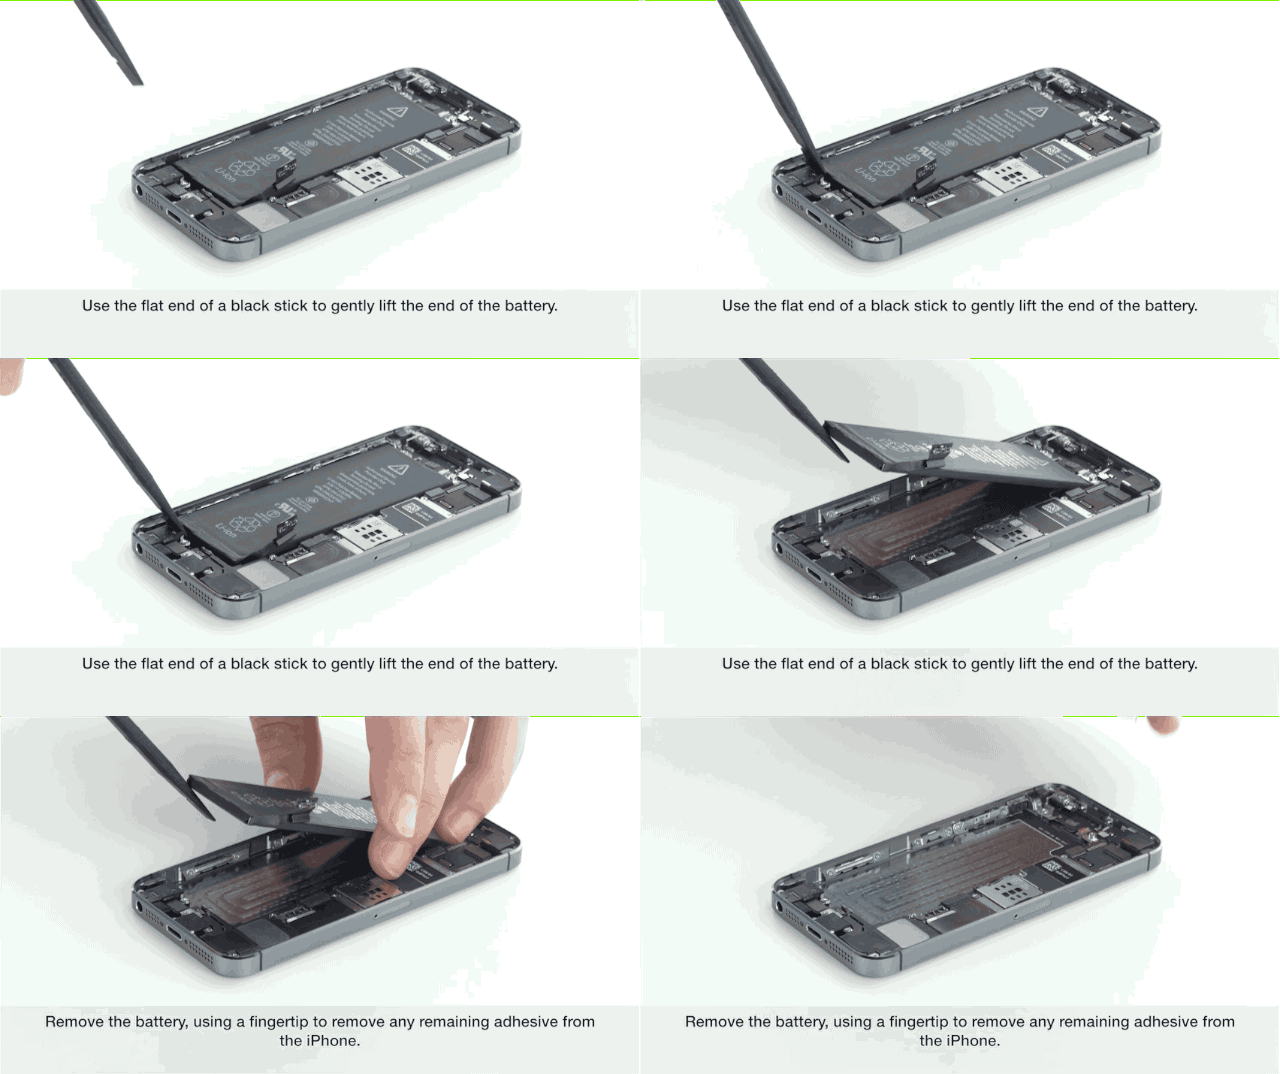
Next, it should be lifted with the help of a black strip.
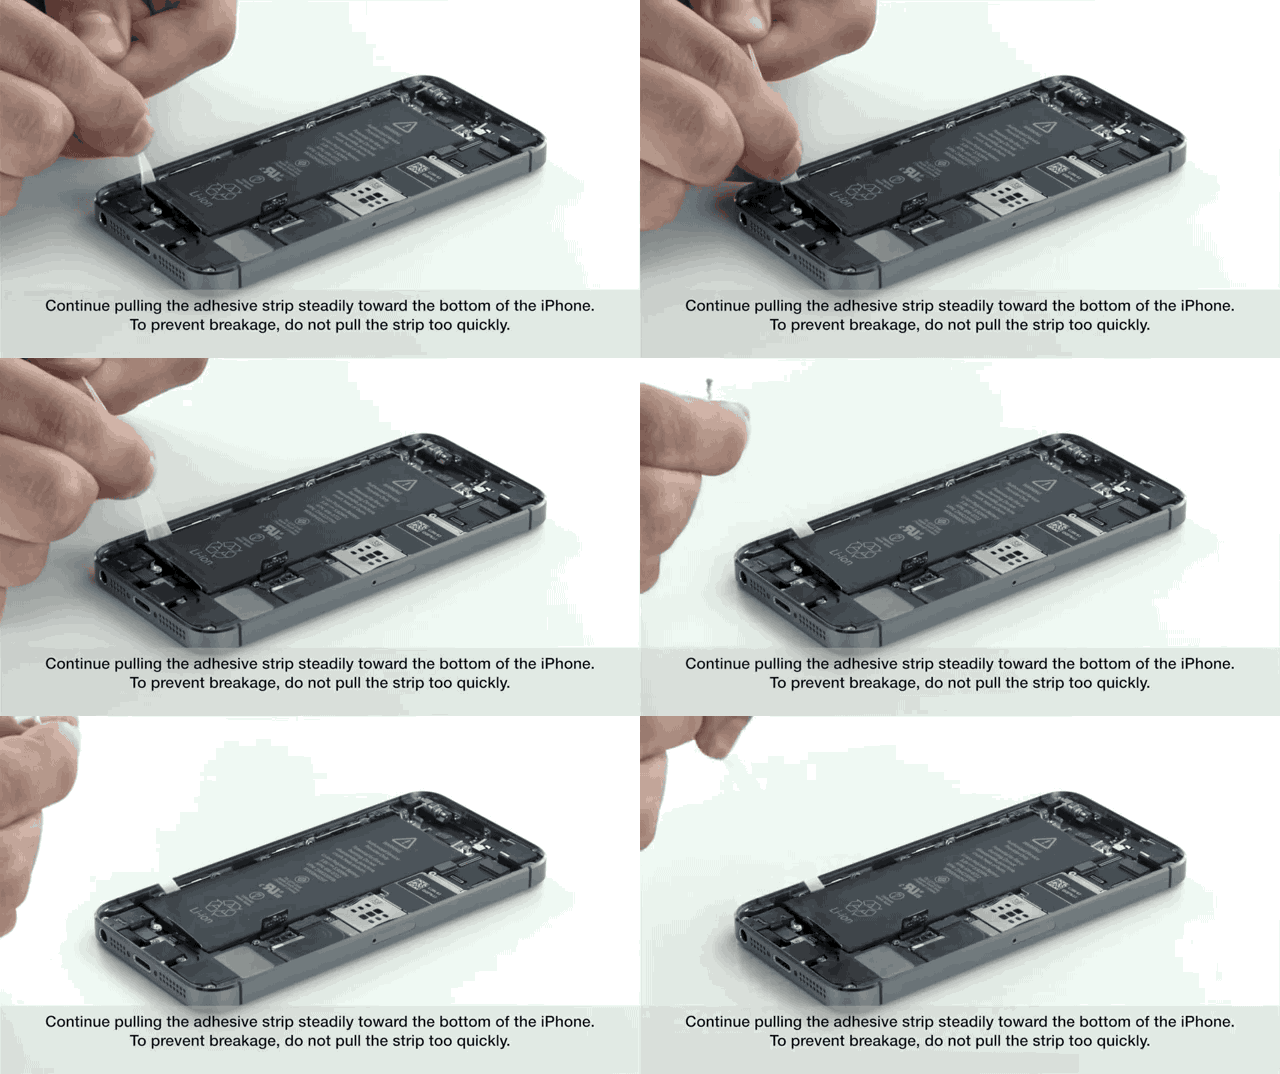
Apple also recommends keeping it tight and pulling it around the battery.
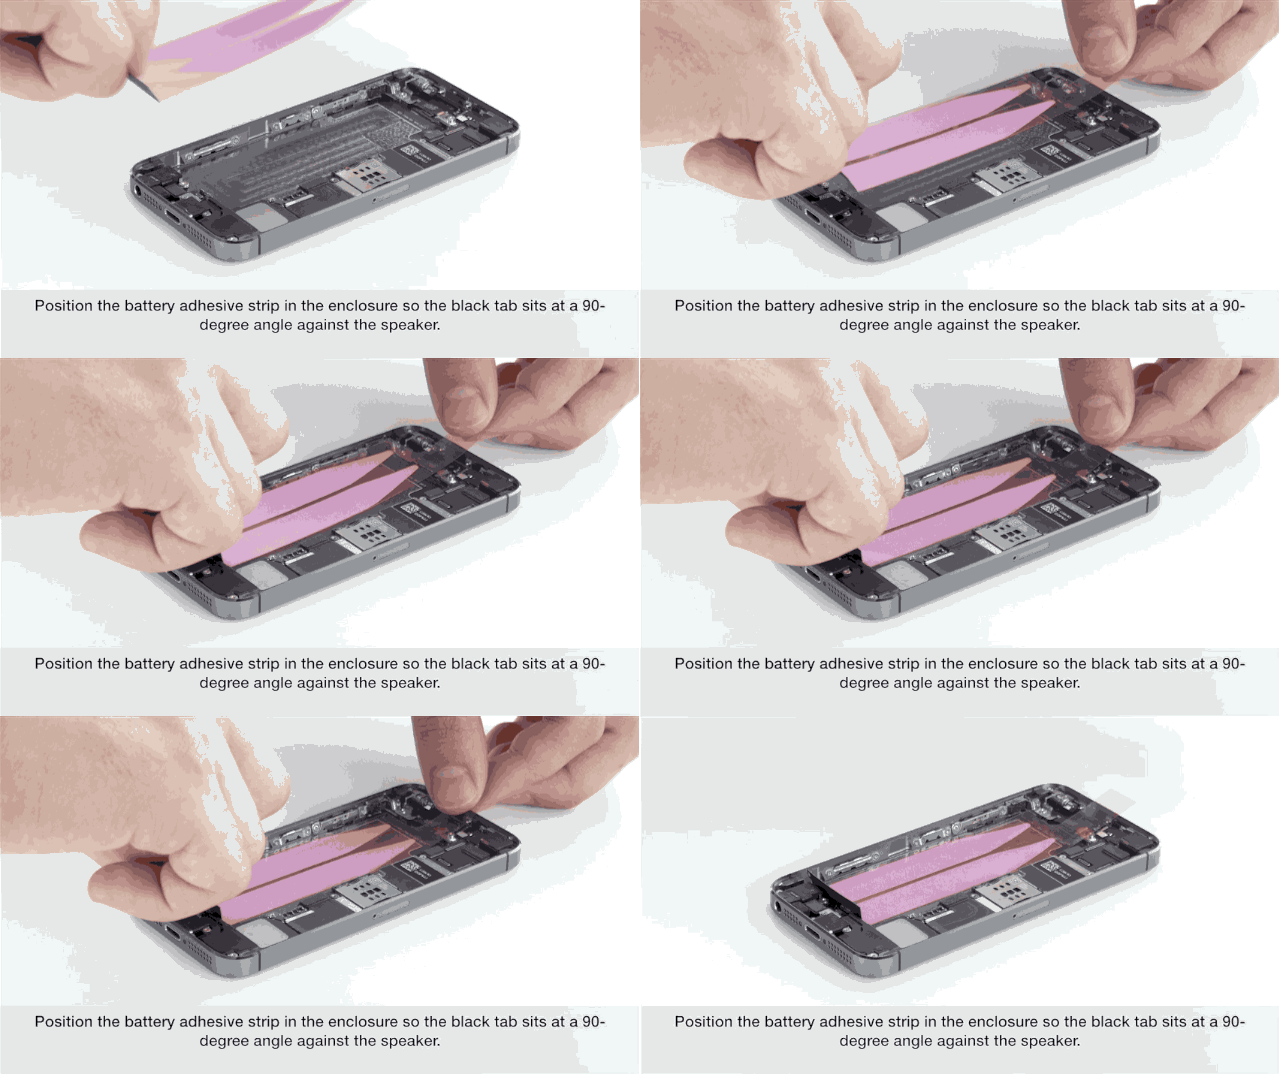
After the battery is removed, extra adhesive strips are applied to keep the battery in its position.
2. Battery fixture of iPhone
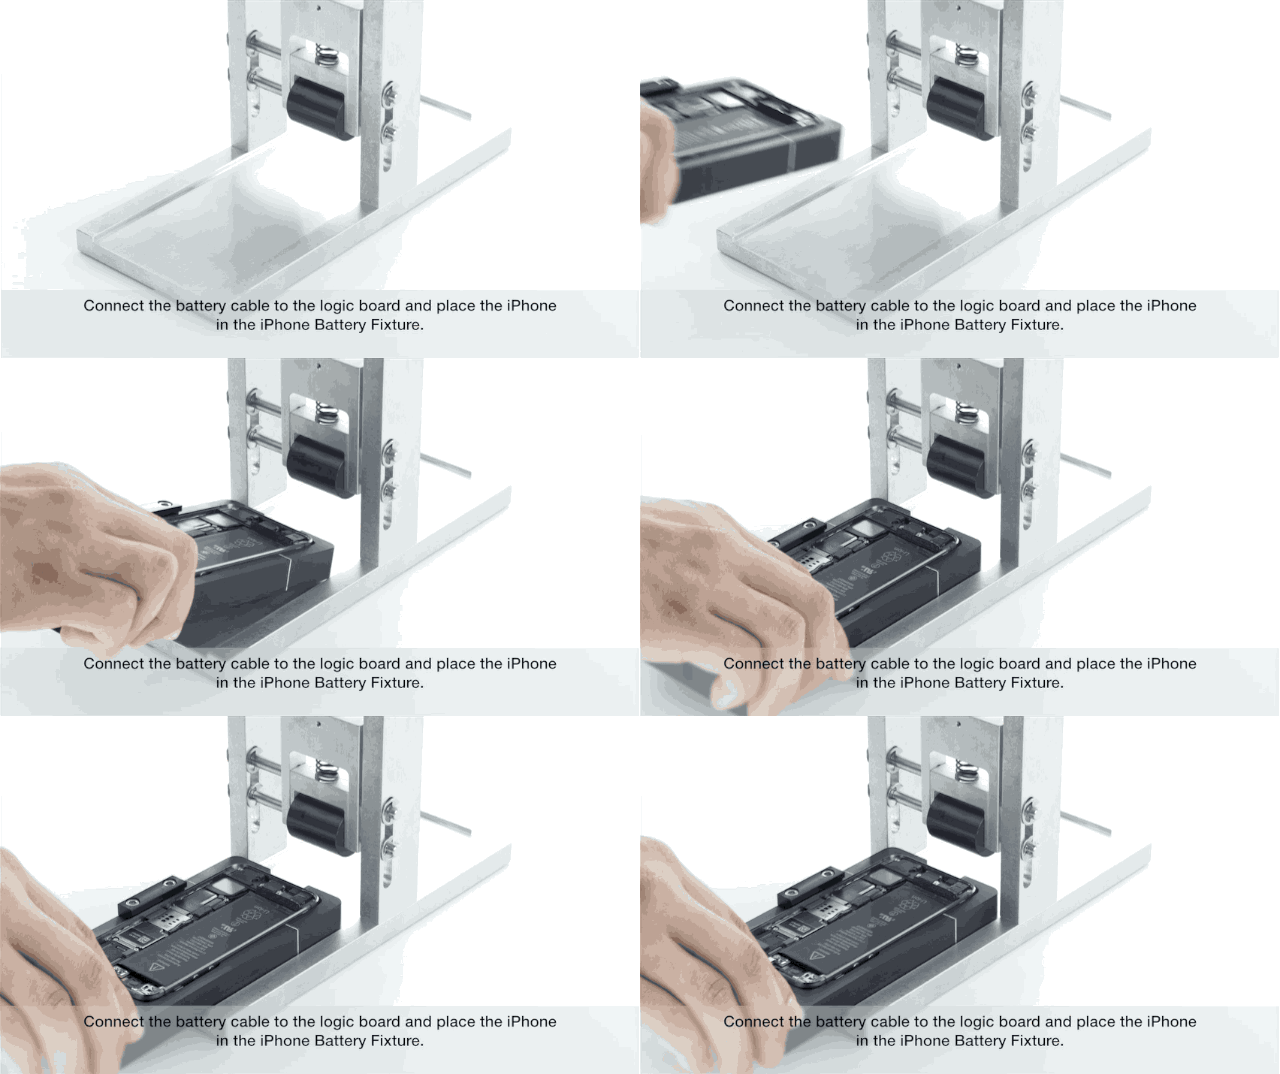
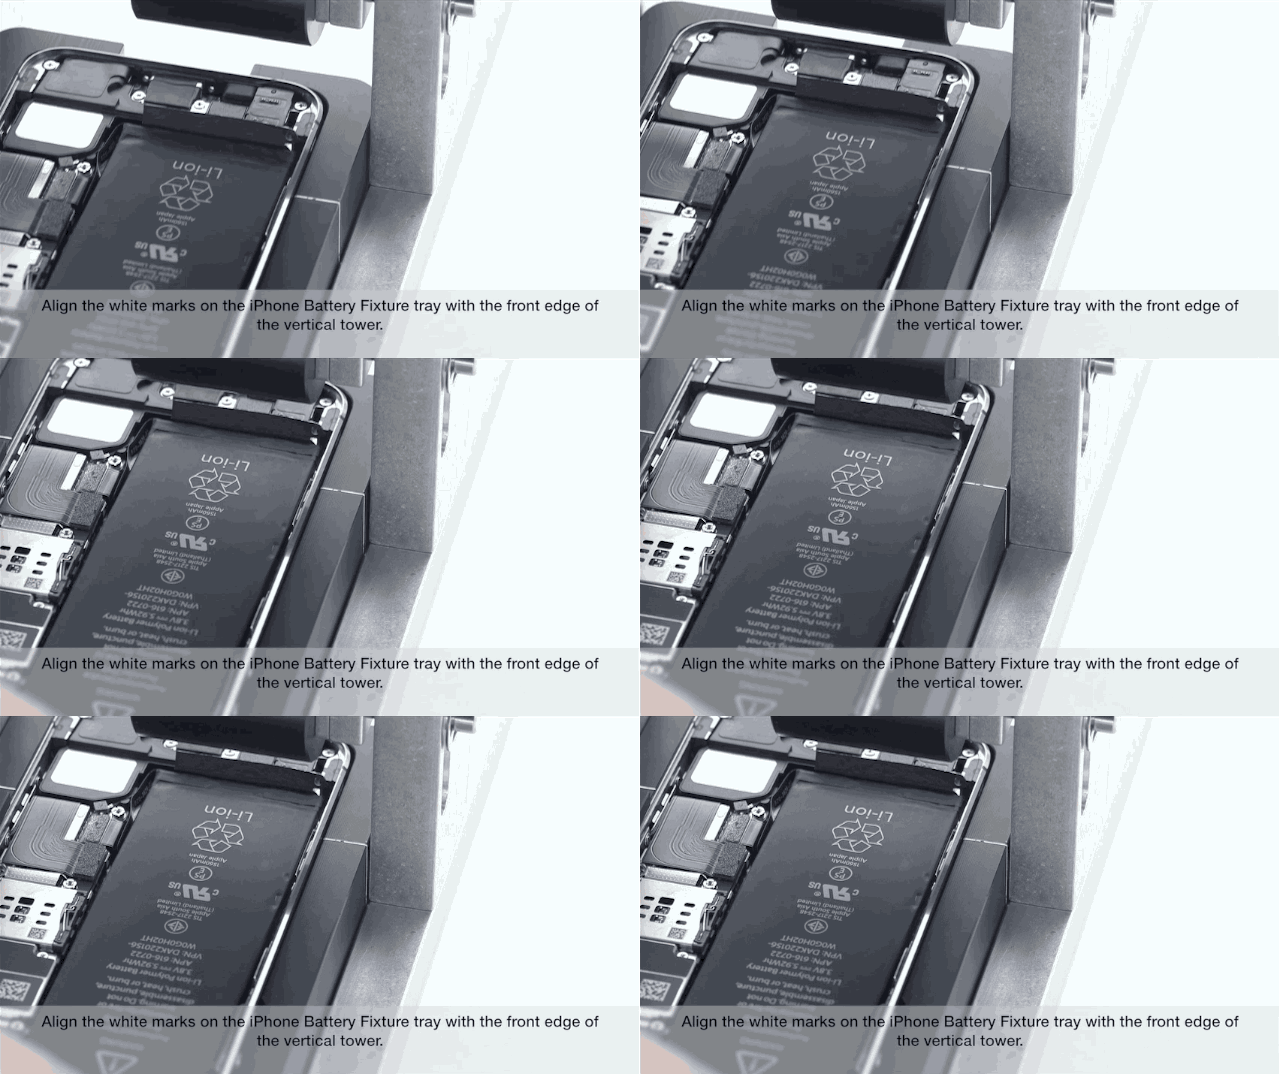
This was created to apply appropriate pressure between the adhesive strips and the new battery. The device prepares the phone for the drop of pressure roller.
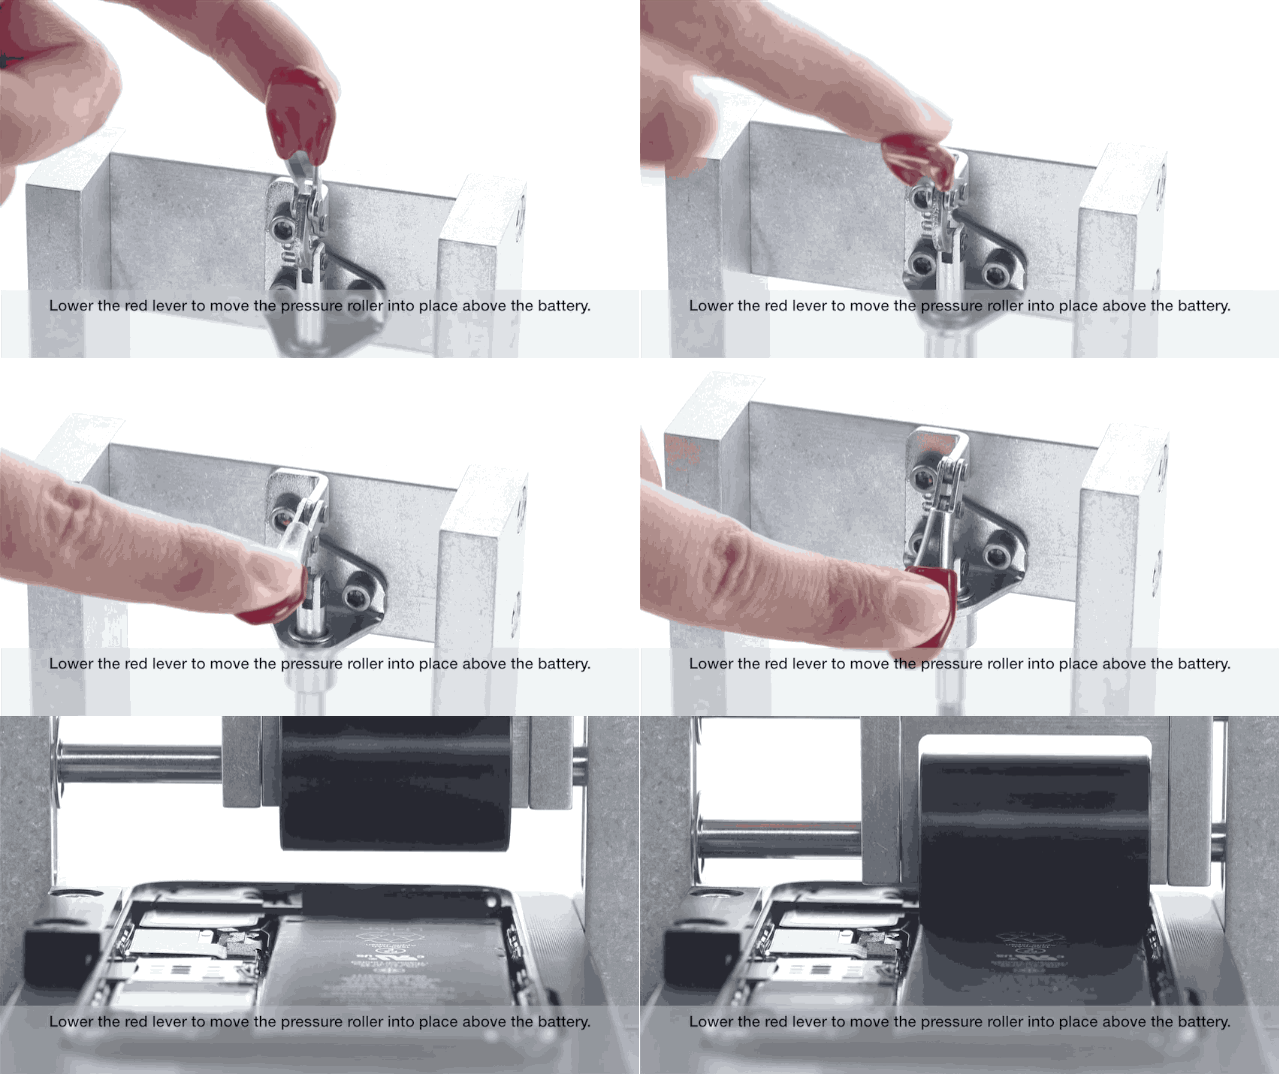
The red lever is then pulled down gently on the new battery to make sure of the position.
The tray then has to be slide backwards a few times to get the task done.
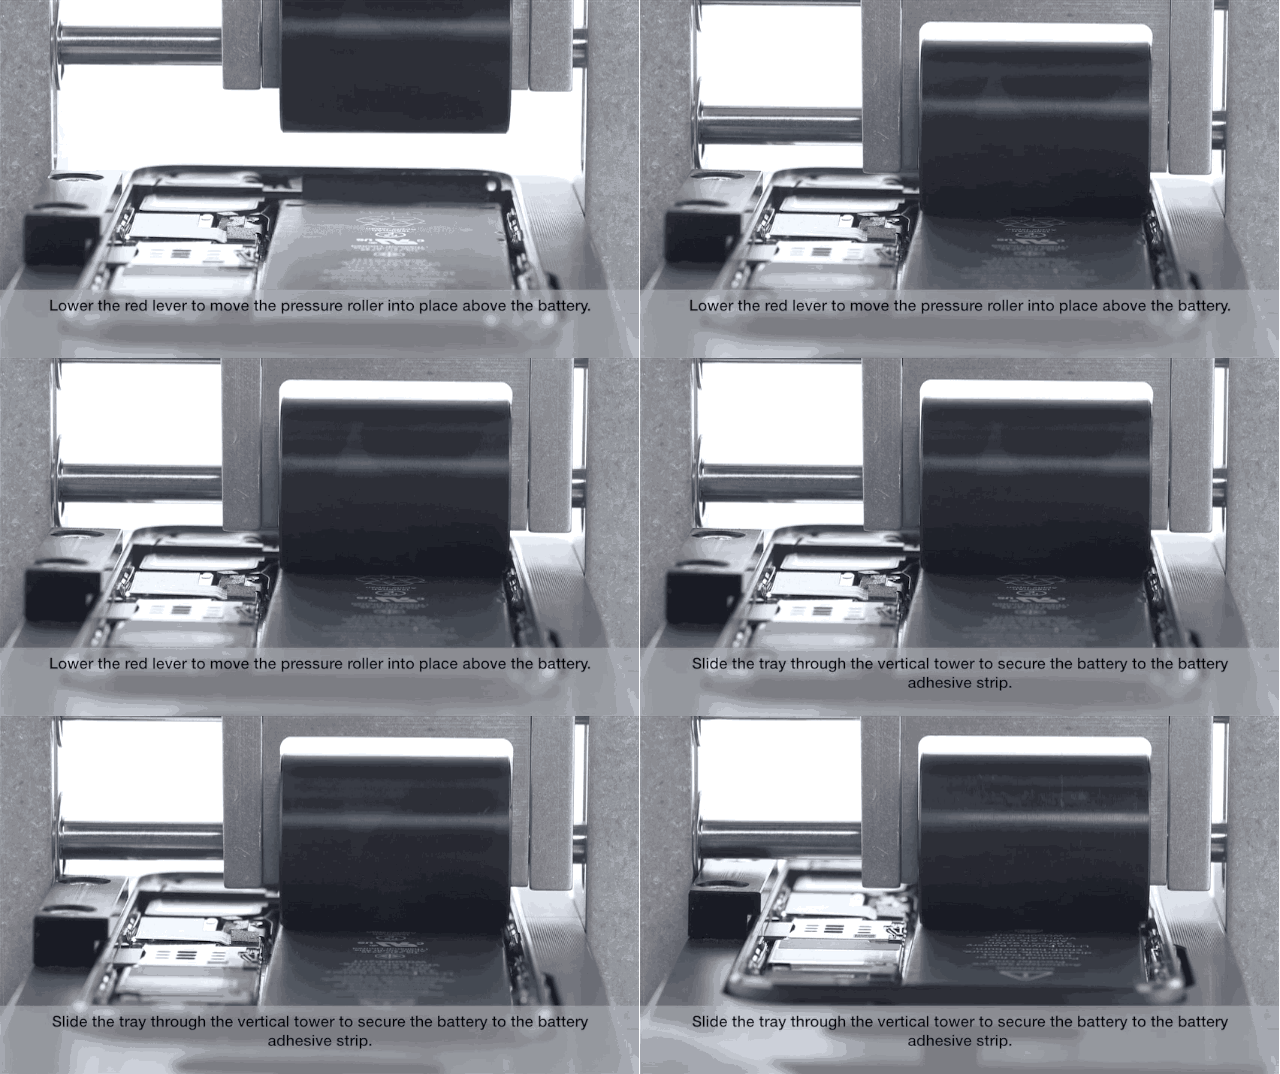
That’s it. The battery is fixed.
3. Replacement of speaker
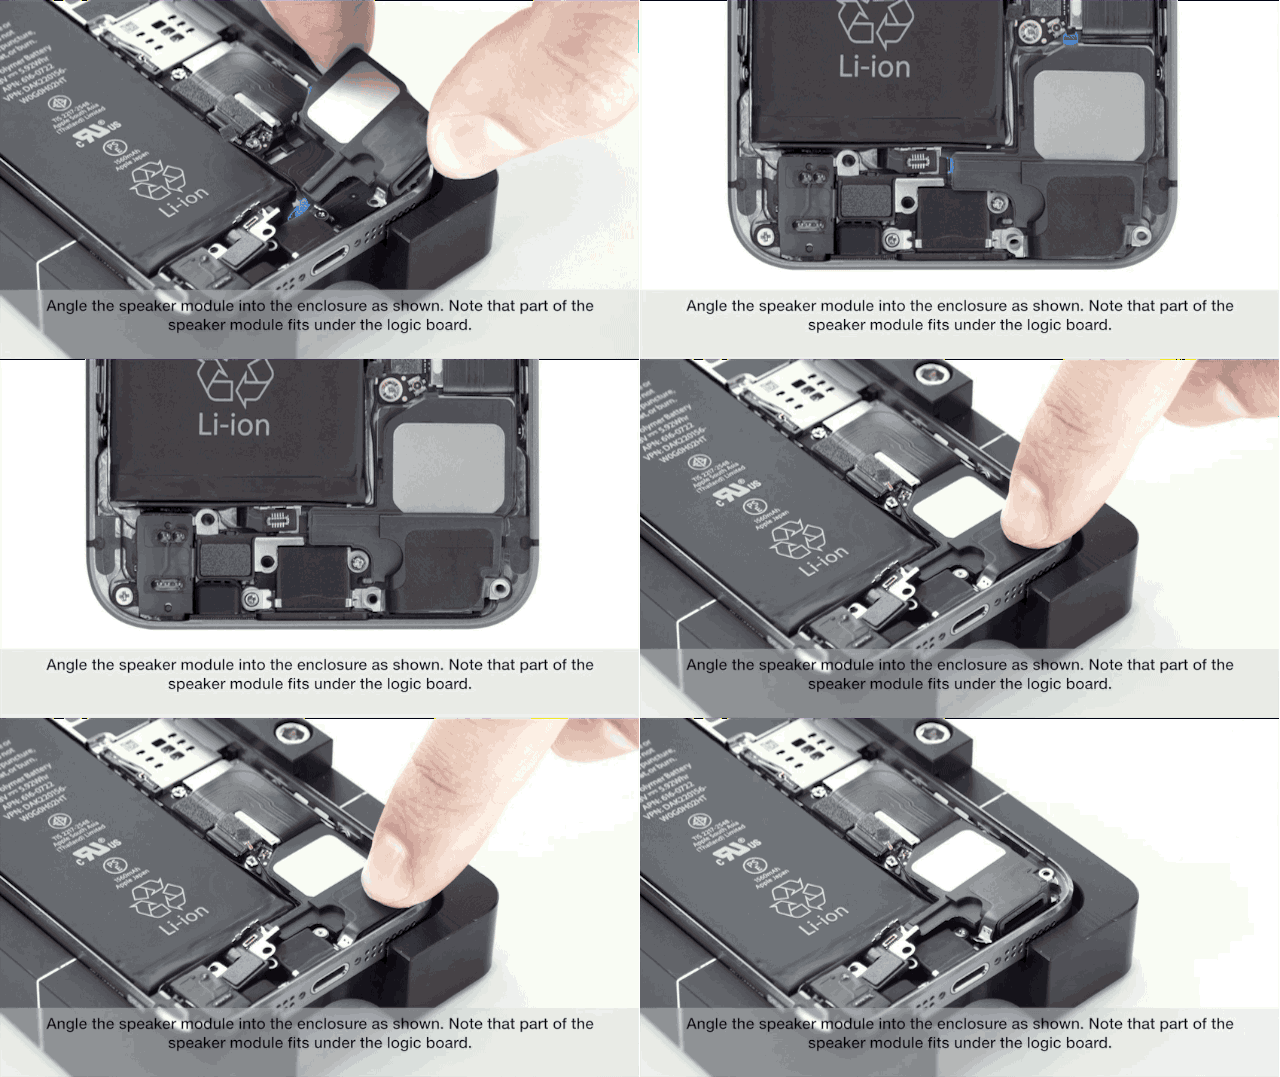
The Apple staff can also replace the speakers, and doing is as simple as unscrewing the broken part and replacing it with a new one.
4. Fixture of Universal Display removal
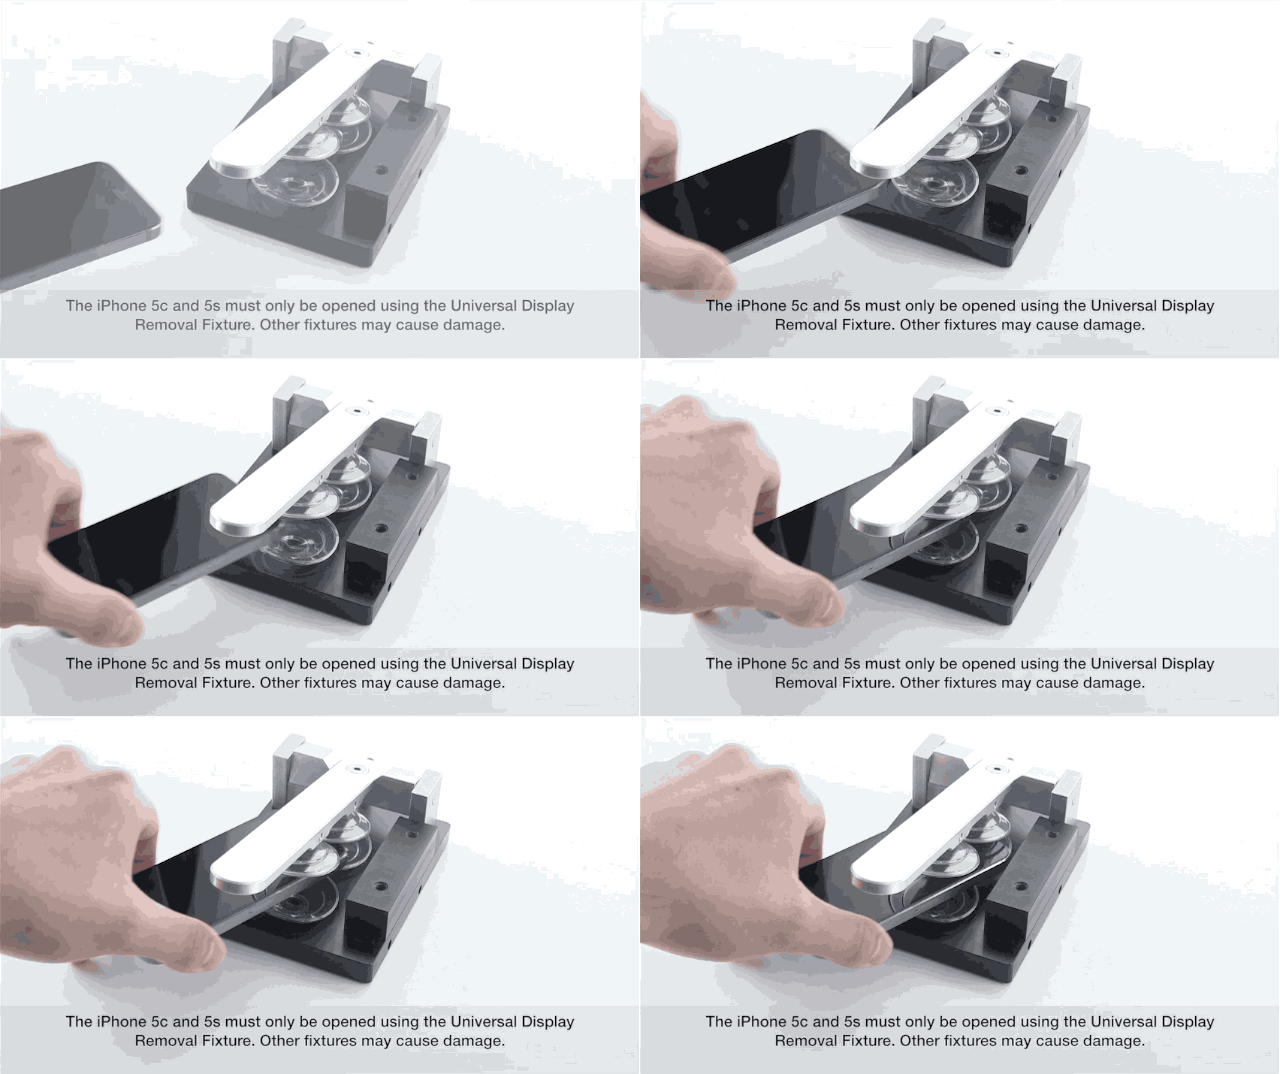
The Universal Display removal fixture was introduced by Apple to provide easy access to internals without placing other components under threat.
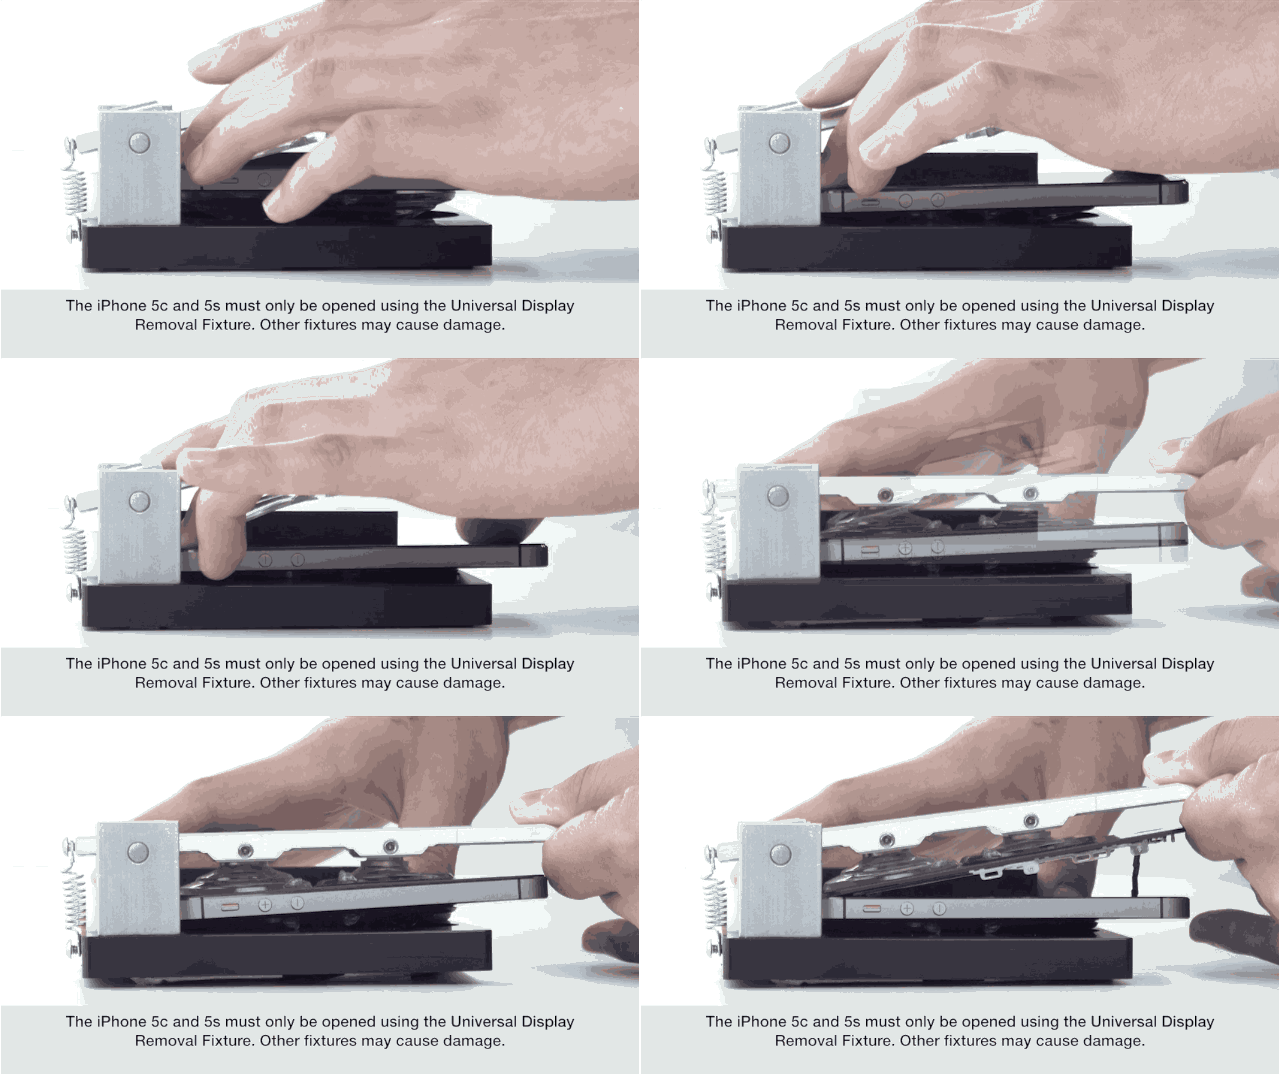
Apple has also mounted suction cups (4 in total) to remove the display on the Universal Display Removal Fixture. The process requires inserting inside the iPhone, dropping down the suction comes and pulling up the spring lever.
5. Ejector tool SIM
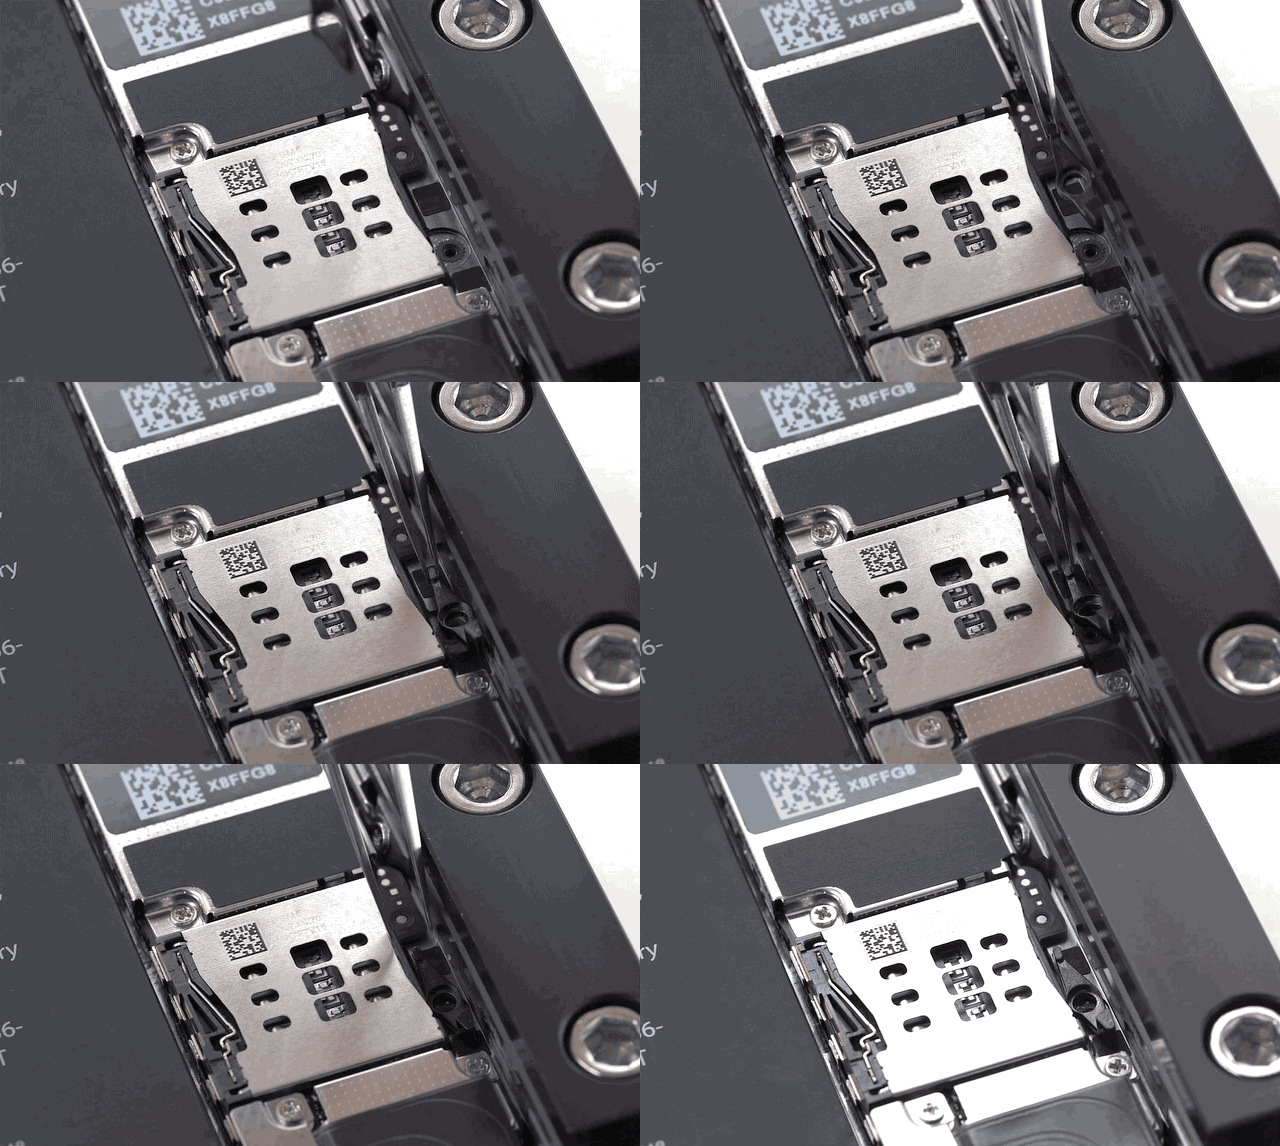
SIM Ejector has one of the highest failure rates, but it can be fixed quickly with a few tweezers.
Related iPhone Fixes & guides
So what do you think? Too easy for the Geniuses out there?

![Honor Google FRP Removal Service for ANY Model [INSTANT] honor frp removal service](https://cdn.unlockboot.com/wp-content/uploads/2024/05/honor-frp-removal-324x160.jpg)


![30 Best Cydia Repo Sources For iOS 16/15/14 Jailbreak [2024] best cydia sources 2020](https://cdn.unlockboot.com/wp-content/uploads/2020/06/cydia-sources-13-100x70.jpg)