Calls are important in many instances; you just can’t a WatsApp message to your grandmother or talk something important with a client via text message. However, there may be a time where you can’t get your call connected, perhaps because of a carrier network issue or some other problem.
What do you do if that happens? You enable Wi-Fi calling – the ultimate solution to the issue. It is available on your iPhone 7, 6S or 6 with iOS 11, 10 or iOS 9 installed. Luckily for you, the iOS 11 firmware carries the legacy of amazing features.
However, you need to read the following note below before you begin the process, so that you can do everything right.
Note: This WiFi calling feature is quite new in the iOS 11 version, so you may need a few attempts to get it done right. Also, only AT&T, Sprint, Verizon, T-Mobile, Rogers, Bell, EE UK, Vodafone, 3 and SmarTone users can take advantage of WiFi calling at this point in time; others should remain patient and wait for the good news.
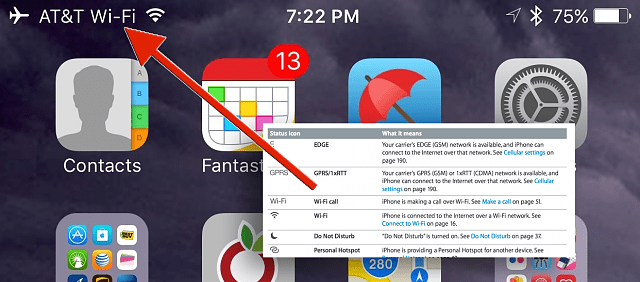
Use WiFi Calling on iPhone
Steps to Activate WiFi calling on iPhone running iOS 11/10
Step 1: Go to Settings
Step 2: Select the option of “Phone” from the available list
Step 3: Select and activate “WiFi calling”
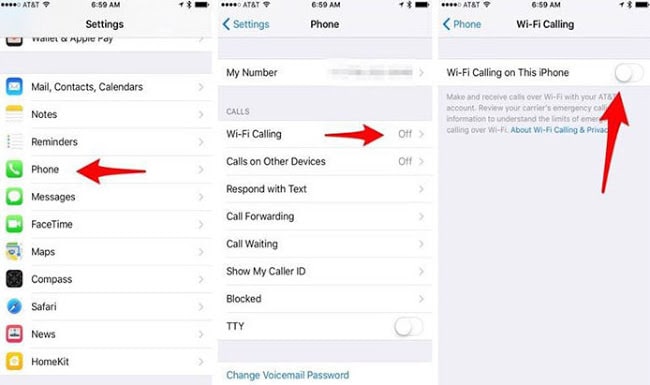
Activate WiFi Calling On iPhone
Step 4: The switch should be toggled. This is when a window will appear asking for confirmation to activate WiFi calling, followed by another window displaying WiFi calling in blue.
Step 5: Choose “Continue” and then you’ll be able to make calls through WiFi.
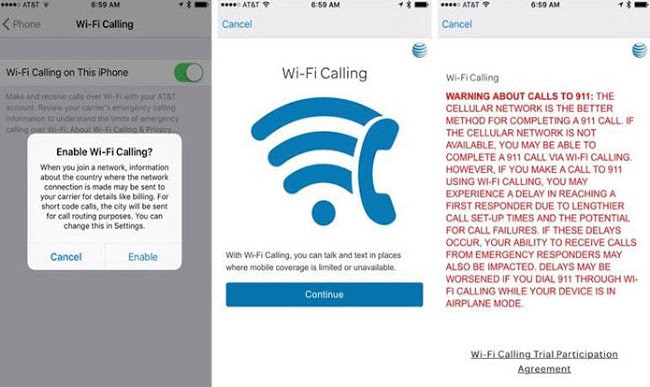
Enable WiFi Calling On iPhone
Before you use this feature please be aware of this particular essential: When you’re calling Emergency Services, you will need to wait for some time as the call set-up times are lengthier. An alternative option is to check if your service provider is working in this instance.
Also, it can take a few minutes before the WiFi indicator pops up beside your carrier name on the top of your device.
That’s all you need to know. Follow the steps above to start WiFi Calling with your iPhone running iOS 11 and iOS 10.



![30 Best Cydia Repo Sources For iOS 16/15/14 Jailbreak [2024] best cydia sources 2020](https://cdn.unlockboot.com/wp-content/uploads/2020/06/cydia-sources-13-100x70.jpg)