Want to change Apple ID country to US without credit card? Well, you can change it not only exclusive to US region but to other regions as well. We have confirmed that this method is applicable in 2017. There are certain apps that are only available for a certain region, sometimes the apps are divided between USA & Canada against the Middle East. Hence, some apps will only available in the US region and if your iOS device is connected to another region, the app will not be shown in your App Store.
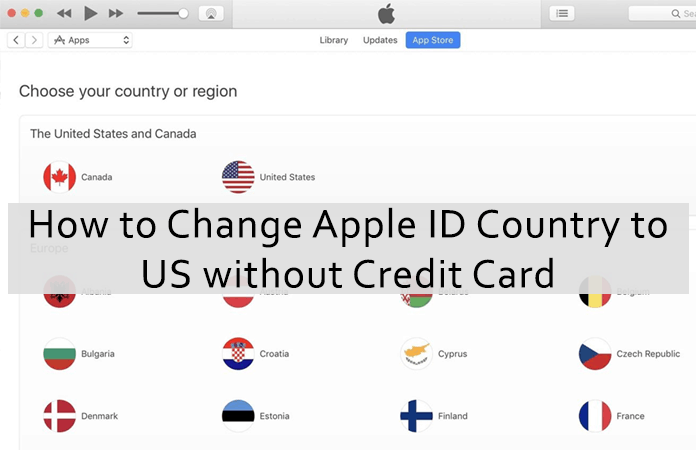
It does not mean that the app from a different region will not work properly, so if you decide to change Apple ID country to US without credit card, rest assured the app will work fine.
Apple tries its best not to allow iOS device users to change their Apple Store region. But, due to change in payment methods, changing your region is relatively easy. Before this, the iOS users had to create a new account for the region they wanted to download the app from. It was a long process, and the users probably had to change between IDs. Now, with this new method, you don’t need to worry about creating a new Apple ID.
How to Change Apple ID Country to US without Credit Card
Important! The new method only works with the regions where the Apple supports PayPal payment option. Moreover, you do not need a credit card for this method to work. So let’s get started within what way you can change Apple ID country to US without credit card.
Step 1: Launch iTunes either on a Mac or PC > Go to Store tab. Once the content is loaded on the page, on the right-side you will see the Account section interface.
Step 2: The system will prompt you to sign in with Apple ID > Enter the credentials > Select Sign in option.
Step 3: Under your Apple ID Summary > Select the Change Country or Region from the right-side
Note: If the account summary does not load up then re-enter the account option. Eventually, you’ll end up with Apple ID Summary.
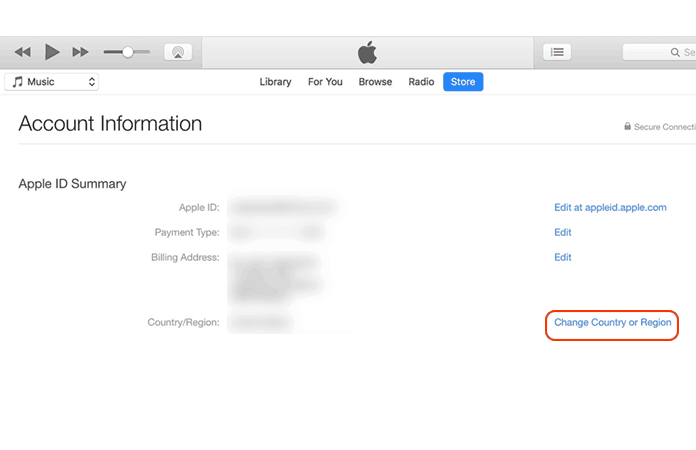
Step 4: From the drop-down menu under the ‘Select a country or region’ title, choose a new region.
Step 5: Agree to terms and condition. You need to agree twice, one for the terms and conditions and second for the confirmation alert.
Step 6: By agreeing, Apple will ask you to provide payment details. Choose the PayPal as the payment option in order to continue.
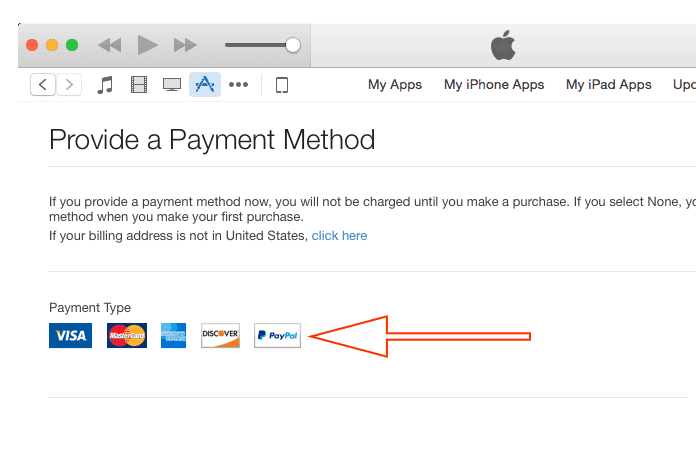
Step 7: Now, login to your PayPal account.
Step 8: It will open the PayPal web page. You can either select the ‘Create an Account’ option or enter an existing PayPal account and ID created for the new region.
Step 9: An error will pop-up stating that both of the ID’s, Apple and PayPal, needs to be from the same region/country. Exit the page, and it will take you to Apple ID account page. A new mode of payment will be listed in the option, labeled ‘None’ select it.
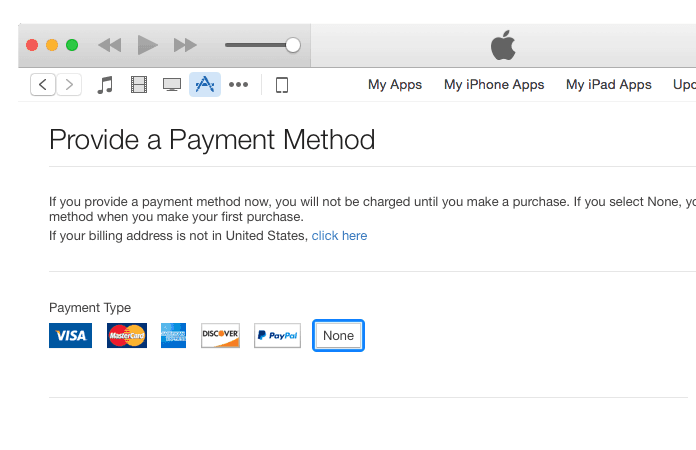
Step 10: Fill in the credentials with a dummy text > Select Continue. It will save the data and take you back to Apple ID account summary page. Here you can see, that your region has been changed for your existing ID.
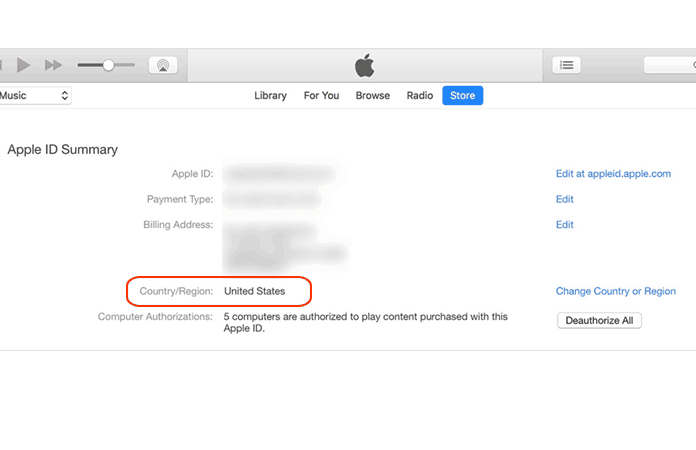
Finished, now you have successfully change Apple ID country to US without credit card. So just download your desired apps from the new region.
Read Also: How to Unlock a Disabled Apple ID
Let us know in the comments if you faced any problems in any of the methods and we will happily provide you with the assistance.



![30 Best Cydia Repo Sources For iOS 16/15/14 Jailbreak [2024] best cydia sources 2020](https://cdn.unlockboot.com/wp-content/uploads/2020/06/cydia-sources-13-100x70.jpg)