If you are not using the incognito mode on your browser, every online activity will be saved on your iPhone browser’s history. However, this is not something that you would like or want someone else to have an access to. For your convenience, we are presenting you here a simple way to clear Safari history on iPhone.

Clearing Safari history and website data will erase everything that you have browsed on the internet, cookies, download history, cached images and files, auto-fill form data, etc.
Steps to Clear Safari History on iPhone or iPad
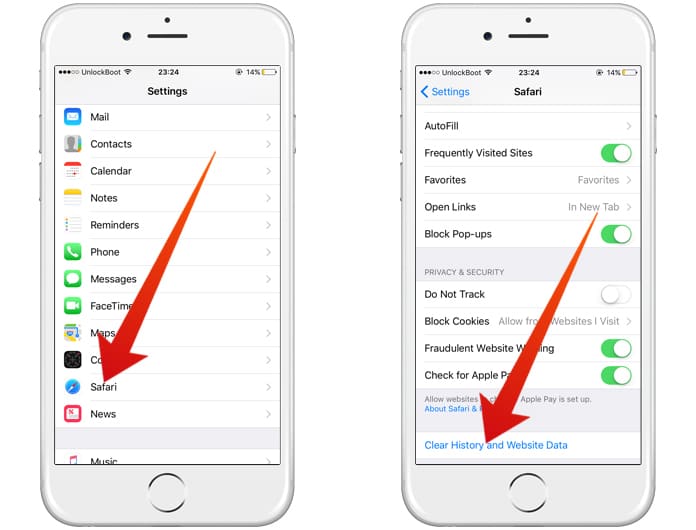
- Go to the ‘Settings’ tab on your iPhone.
- Open ‘Safari’.
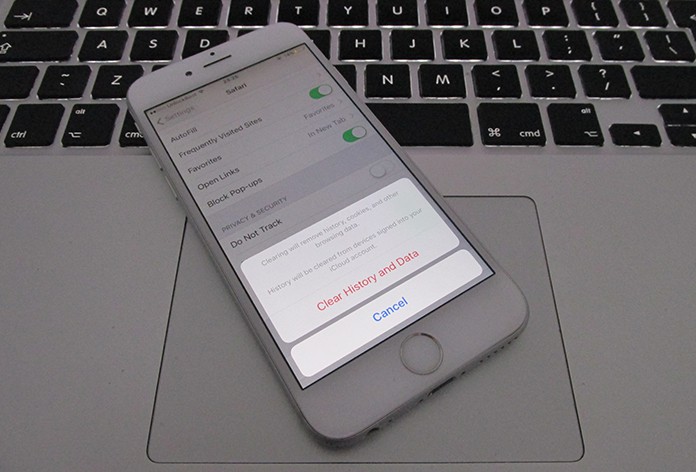
- You will see an option of ‘Clear History and Website Data’. Tap on that.
- When the alert of ‘Clear History and Data’ prompts on your screen, tap ‘Clear’.

Clear Safari history and Website Data on iPhone
Once the history has been erased on your iPhone, the ‘Clear History and Website Data’ will appear grayed out.
What If You Only Wish To Erase Website Data?
There may be a case where you don’t want to get rid of the complete Safari history but just the website data. For that, you will need to:
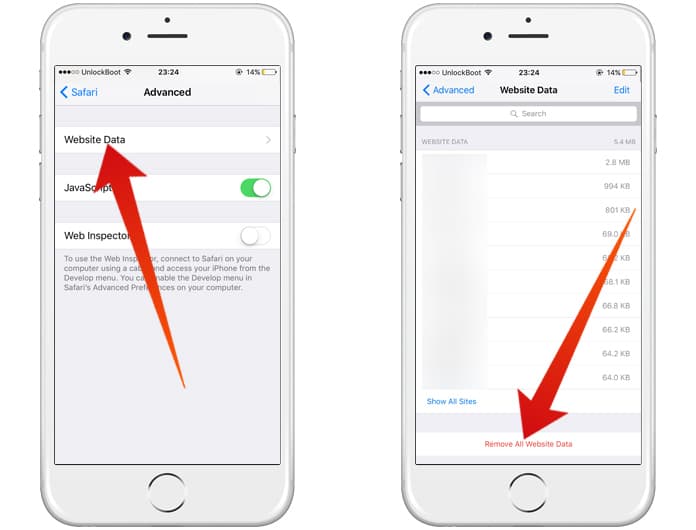
Go to Settings -> Safari -> Advanced -> Website Data.

Clear Safari Website Data on iPhone
Followed by that, click on ‘Remove All Website Data’ and confirm your decision by tapping on ‘Remove’ when the pop-up flashes on your iPhone screen.
What Happens When You Use A Private Browsing Window?
For all the times you are using a private browsing window, nothing will get stuck on your browsing history. Neither any website that you visit nor any other kind of website data will be saved in your iPhone’s browsing history.

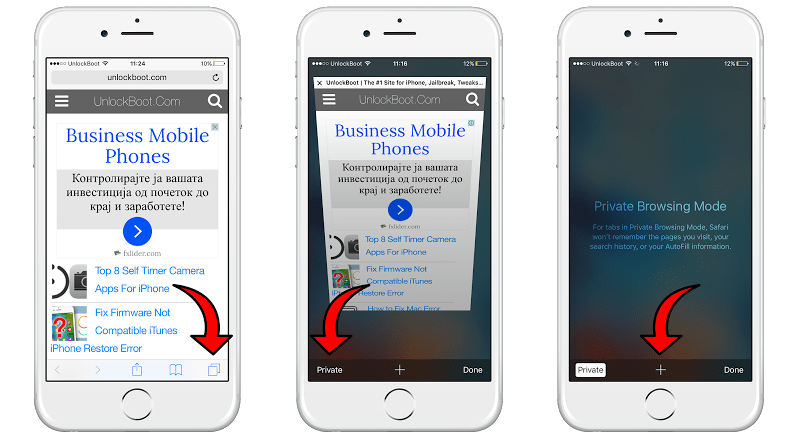
3 Steps to Use Private Browsing Mode on iPhone and iPad
Here is how you can switch to Private browsing mode. Launch Safari browser and click on the tab switcher icon appearing on your screen’s bottom right corner. Next, click on Private shown on the bottom left corner of your iPhone screen. And you will be switched to private browsing mode!
Safari History: Done and Dusted!
You have conveniently learned how to clear Safari history on iPhone. Now you can sit back and relax because none of the people whom you don’t want to peek into your browsing history will have an access to it.
Read Next: How to Clear Facebook Search History on iPhone
Try it out on your phone and let others know about it too!


![30 Best Cydia Repo Sources For iOS 16/15/14 Jailbreak [2024] best cydia sources 2020](https://cdn.unlockboot.com/wp-content/uploads/2020/06/cydia-sources-13-100x70.jpg)