Two Step Authentication has grown into one of the most trusted password security measures and it’s based on the operation of TOTP (Time-based One-time Password). The app that really brings two-factor authentication into the limelight is Google Authenticator which, as the name suggests, is created by Google itself. For securing your accounts, your device must be compatible with the Google Authenticator app since it may not work if you’re using Google Authenticator for Windows.
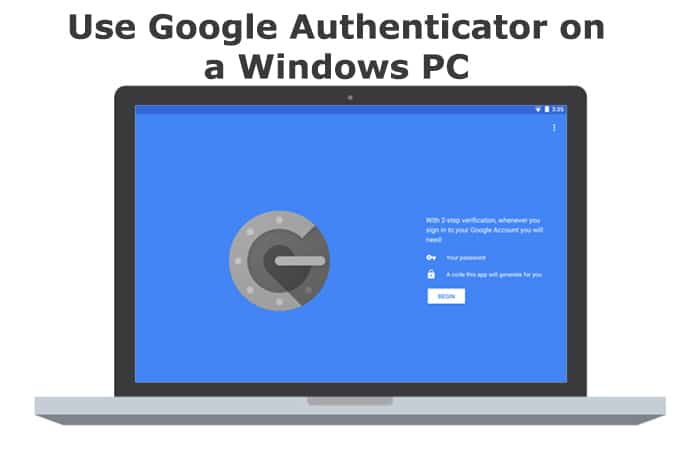 However, the Google Authenticator app is built on a quality algorithm by which we mean that developers can create their own one time passwords for their own apps. And one such application is Google Authenticator for Windows PC is WinAuth.
How to Use Google Authenticator for Windows 10/8/7 PC
WinAuth isn’t a complicated application and it’s portable and open-source and can support different two-step authentication apps like Google Authenticator, Microsoft, Battle.net, etc. Once you’ve downloaded the app from its official website, just open the zip file and extract it.
Steps to Use Google Authenticator for Windows with WinAuth
1. After you extract WinAuth app, you need to open WinAuth.exe on your Windows Computer.
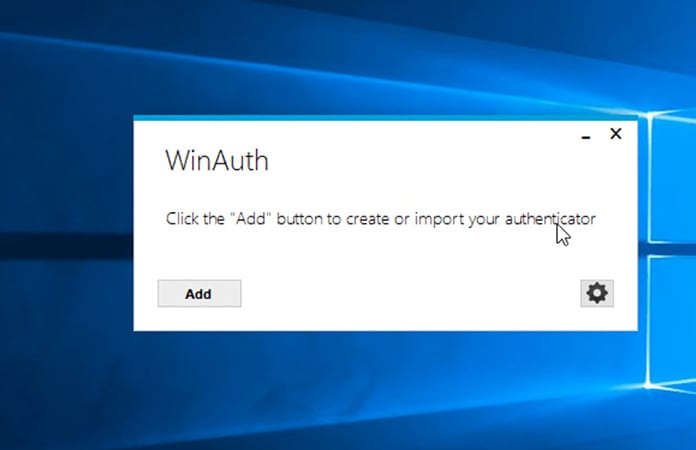
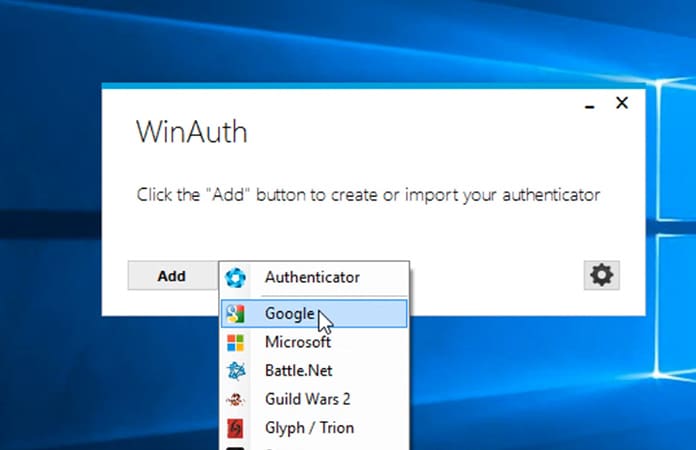
2. To function Google Authenticator in WinAuth you must click on the “Add” option and select the option “Google” which will open the Google Authenticator configuration window. Now, it is over here that you’ll need to enter the shared key given by Google to get the TOTP.
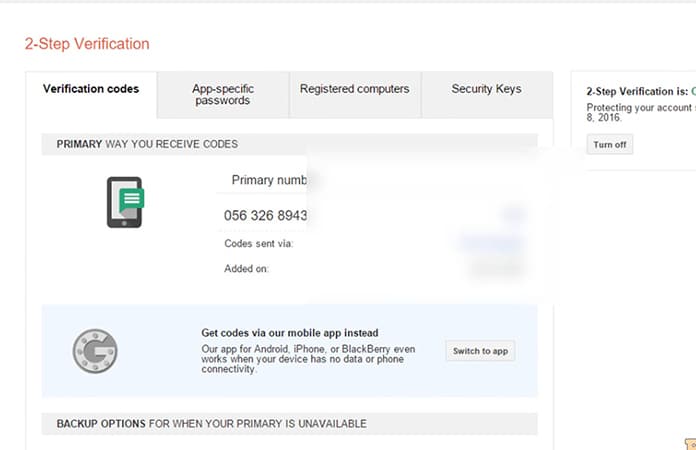
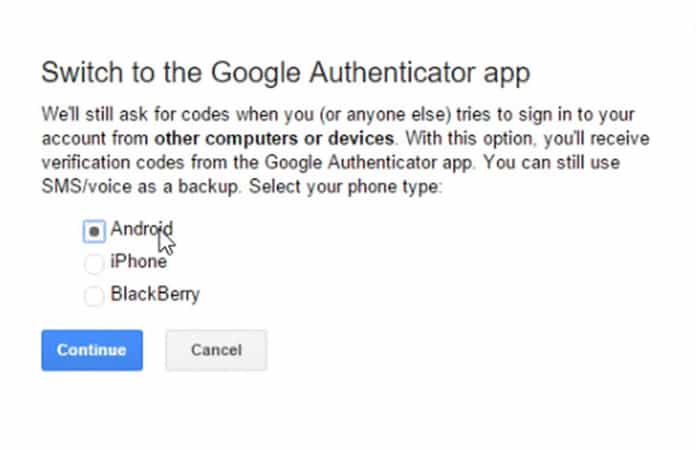
3. In order to obtain your secure key, go to the Google Account settings page and scroll down till you can enable two-step authentication after which you have to select the button “Switch to app.”
4. Here will you will choose the radio button “Android” and click on “Continue.” But this doesn’t actually hold any importance since we’re not operating on a mobile device.
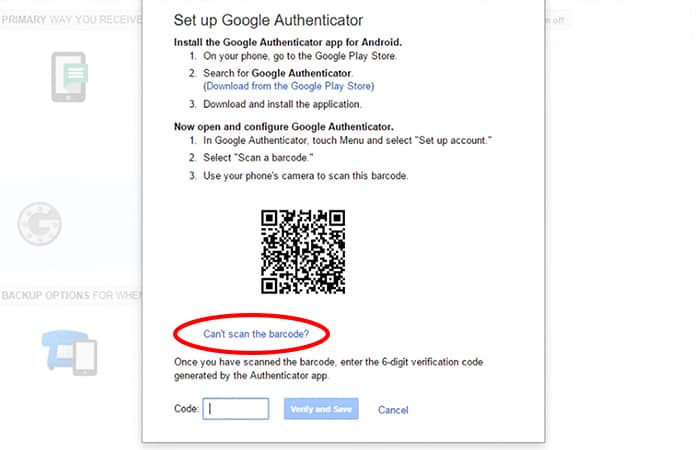
5. You’ll be shown a barcode which you have to scan but WinAuth doesn’t support scanning barcodes so you have to click on the link “Can’t scan the barcode” and enter the shared secret key.
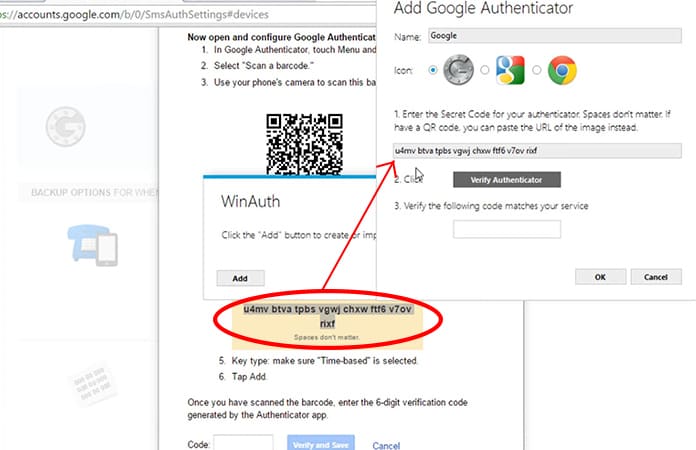
6. Google will now display the secret key so just choose the secret key and copy the code. Once the key has been copied just paste the copied secret code in the WinAuth window and click “Verify Authenticator” to generate the time-based one-time password.
7. Then copy the generated one-time password and paste it on your Google security settings page. Choose “Verify and Save” to verify the generated code.
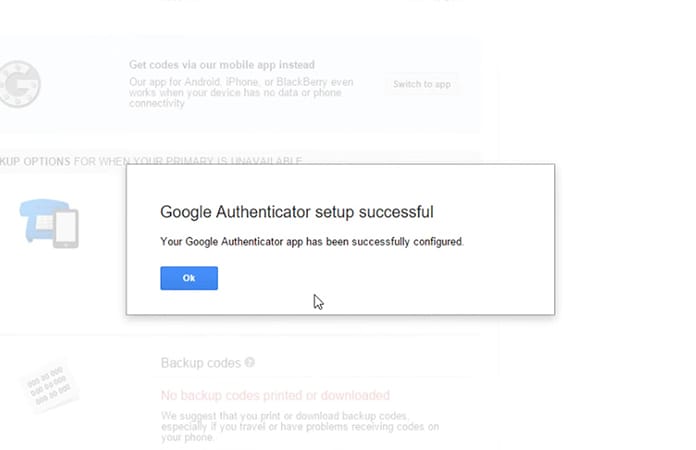
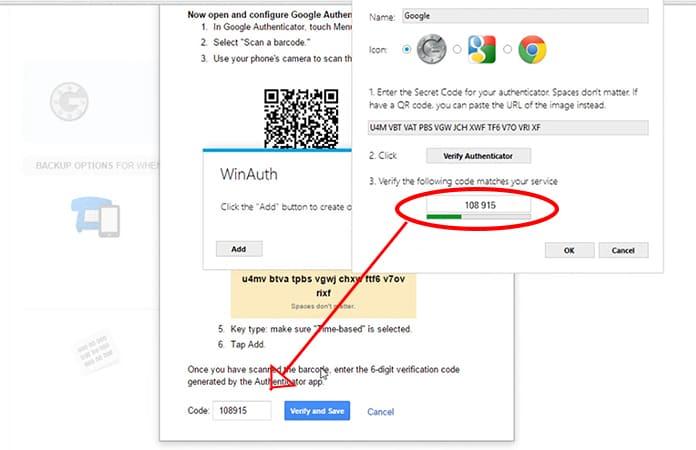 8. If you’ve followed all these steps accurately, Google will show you a confirmation window revealing that and after that just choose “Ok” button to save the changes in your Google account.
9. On the WinAuth window after you’ve confirmed the generated code, click on the Ok button so that the changes in the WinAuth application are saved.
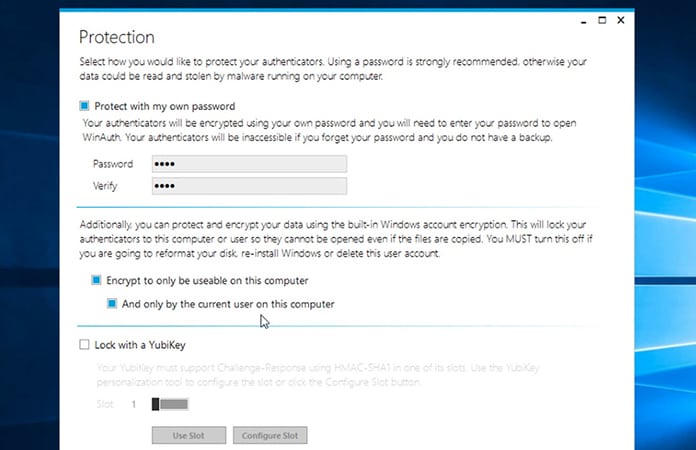
10. You have to encrypt the files and enter the password twice to cement it into the system. As a substitute configuration, you can have WinAuth encrypt the files. So that it can only be used on the computer you’re using at the moment. But we would suggest password protection since it’s relatively much more viable.
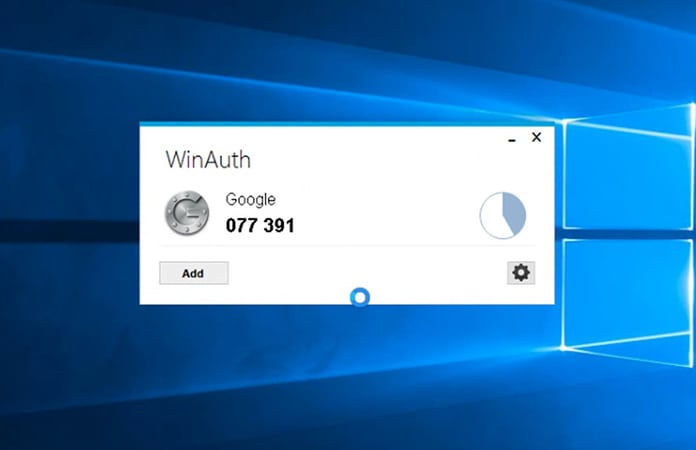
That’s it you have successfully setup the WinAuth tool. Now, you can use Google Authenticator for Windows PC.
 I hope this helps you and if you have any problems regarding installing or setting up WinAuth. Or if you have any issue regarding any of the above-mentioned steps, feel free to ask in the comments below.


![30 Best Cydia Repo Sources For iOS 16/15/14 Jailbreak [2024] best cydia sources 2020](https://cdn.unlockboot.com/wp-content/uploads/2020/06/cydia-sources-13-100x70.jpg)