We have discovered two methods for recording FaceTime video calls. This methods are fairly simple and easy to understand. This helpful trick will make you able to save fond memories.
If you’re an Apple owner then you know what FaceTime is. It is an app that either uses your data plan or internet connection via Wi-Fi to make video calls. It is another great feature exclusive for iPhone users rather than downloading third party apps to make video calls, iPhone user with a tap of a button can place video calls to other iPhone owners from their contact list.

Have you ever wondered that I could just record this FaceTime video calls of your loved one moments? Well, the method that we are going to talk about is fairly easy to use. The process of recording FaceTime video calls require QuickTime on Mac or through iPhone via Mac.
How to Record FaceTime Video Call on Mac Using QuickTime
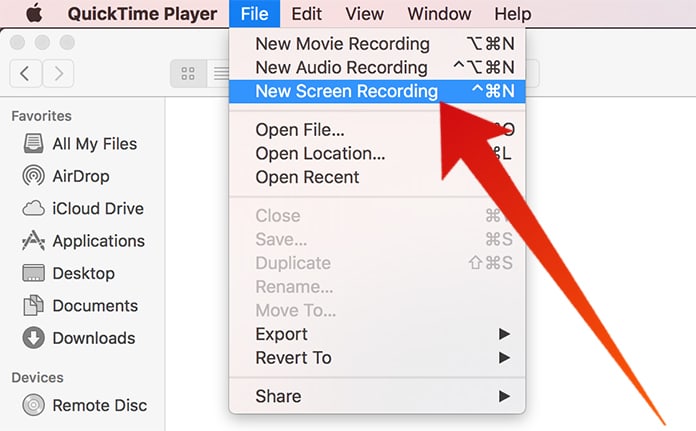
Step 1: Launch QuickTime from your Mac and the select the File tab from the Menu bar.
Step 2: Choose the ‘New Screen Recording’ choice.
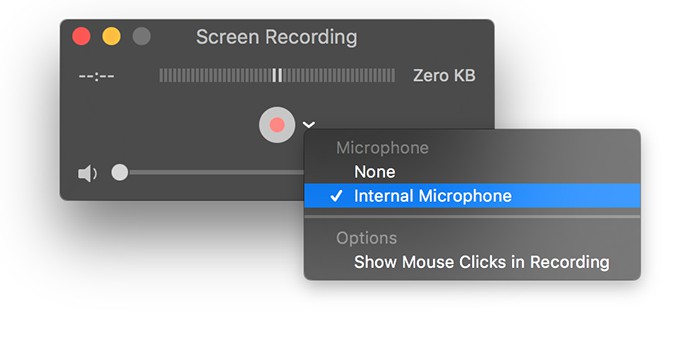
Step 3: From the QuickTime screen, select the ‘arrow’ which will be right next to the record button, then you need to click the internal microphone option for list of available choices of microphones.
Step 4: After that, launch the FaceTime on the Mac. The select the record button from the QuickTime screen and then you need to choose the record your whole screen option from the window. But if you only need to record the FaceTime screen than you have to click and drag it over to the FaceTime screen.
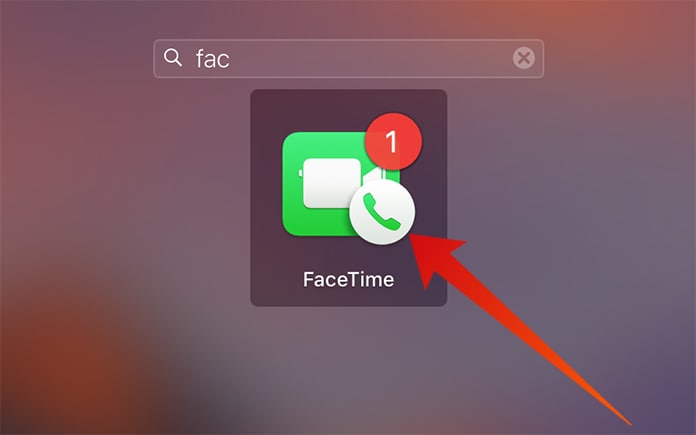
Step 5: Now, you can begin your video call through the FaceTime app and click the button to stop recording which on the Menu bar.

Step 6: Select the File tab from the Menu bar and then choose to save the video from the drop-down menu.
Step 7: A window will prompt up and would ask you to enter a name, just give a name to recording and after that browse the drive you want to save the file and select Save.
How to Record a FaceTime Video call on your iPhone by using Mac
To record from an iPhone you can’t actually do it directly you have to use a Mac; if you want to record the FaceTime video.
Step 1: iPhone needs to be connected to the Mac.
Step 2: Launch the QuickTime from the Mac and select the File tab from the Menu.
Step 3: From here you have to choose the ‘New Movie Recording’ option and the select the ‘arrow’.
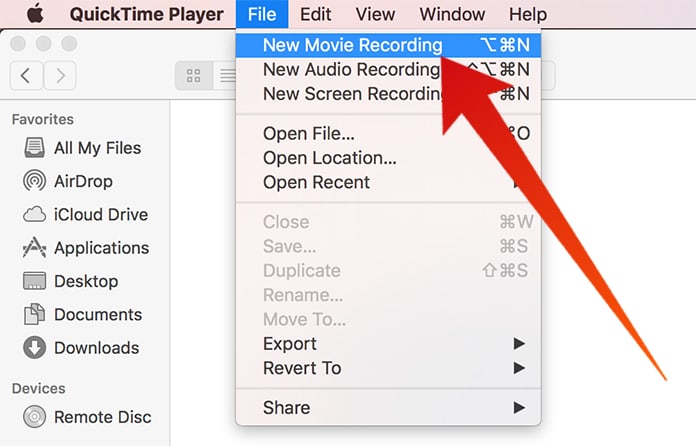
Step 4: After that, click iPhone from the cameras list and you have to unlock the iPhone, by doing so the availability will display in QuickTime.
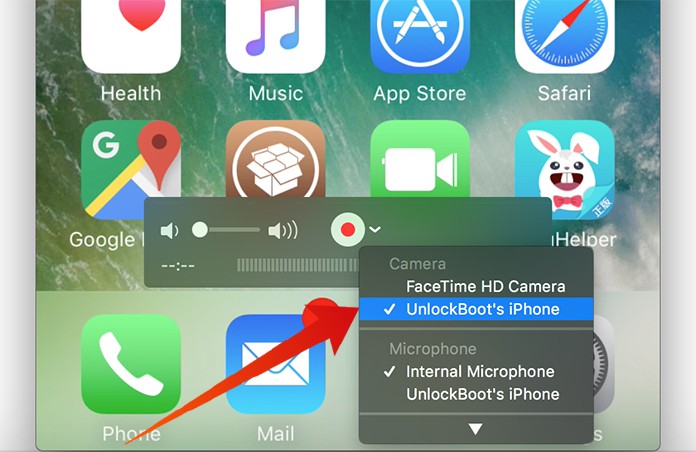
Step 5: From your iPhone app, tap on the FaceTime app and open it. Once opened, start your recording from the Mac by clicking on the record button in the QuickTime.
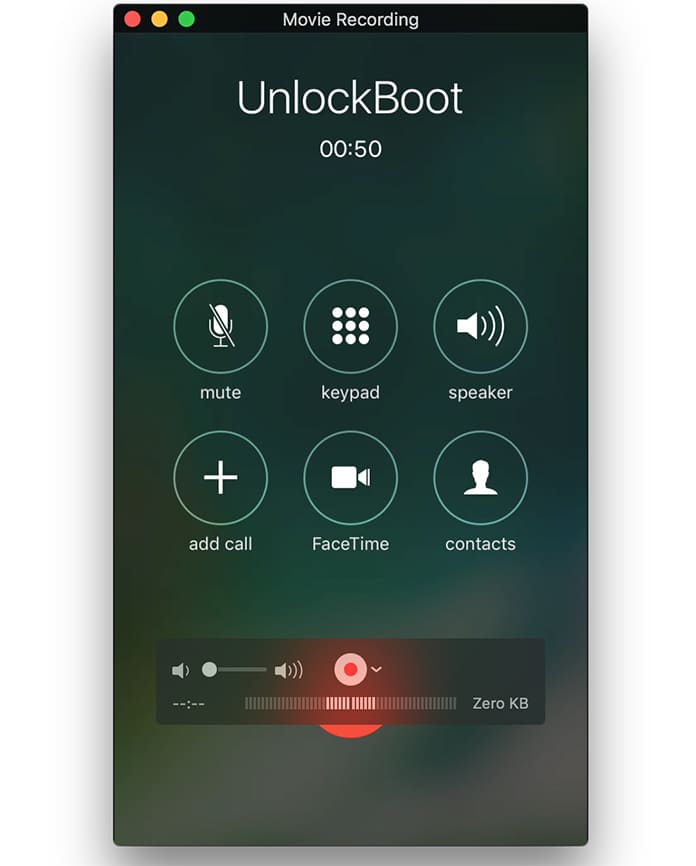
Step 6: Now, from the iPhone video call through the FaceTime app, and from the QuickTime window on Mac click the stop button to not to record past once your video call has been ended.
Step 7: Select the File tab from the menu bar and then you have to click on save.
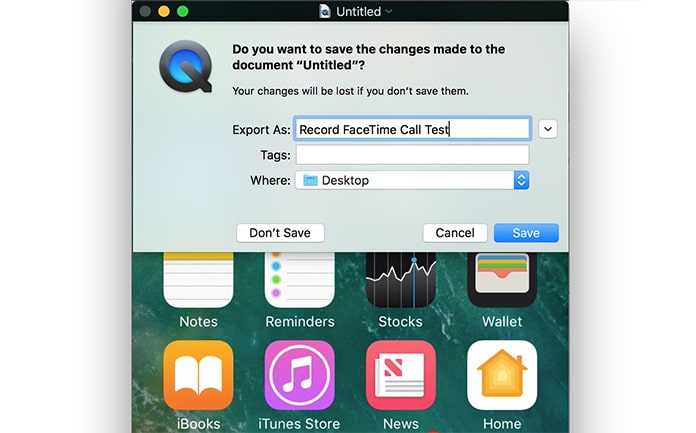
Step 8: Choose a name for the file and a destination and save it.
Here you go, these were the two methods showing you how to save FaceTime video calls on Mac and iPhone via QuickTime.





![30 Best Cydia Repo Sources For iOS 16/15/14 Jailbreak [2024] best cydia sources 2020](https://cdn.unlockboot.com/wp-content/uploads/2020/06/cydia-sources-13-100x70.jpg)