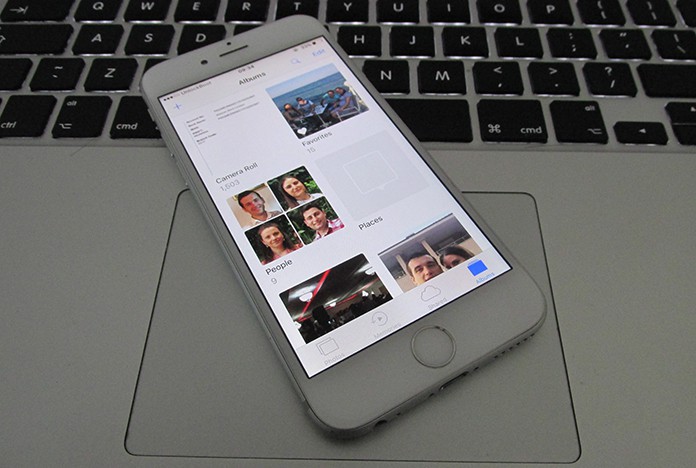
Sometimes you need to change the name of an album in your Photos app. There could be many reasons for this situation. For example, you took some photos during your vacation with your friends. After the vacations, you felt that the name you gave to the photos’ album was not a good one. Now you think that the name should be something that must make you recall your memories when you see the album. Fortunately, you can do this. All you need is going to the Photos app and rename an album by editing it.

The problem with album renaming is you cannot rename the default albums in your iPhone. Screenshots, Camera Roll, People, and Videos are some default photo albums. You cannot rename the default albums, but this is not an issue as you can make custom folders in which you can add photos according to your wish. Same custom folders can be renamed.
5 Steps to Rename Album on iPhone or iPad
As the default photo albums in your iPhone come with your iPhone, you cannot edit or rename them. On the opposite hand, you can quickly rename photo albums. Here we are going to talk about how you can do this job. All you need is following the method mentioned below.
Step 1: First of all, launch the Photos app on your iPhone.
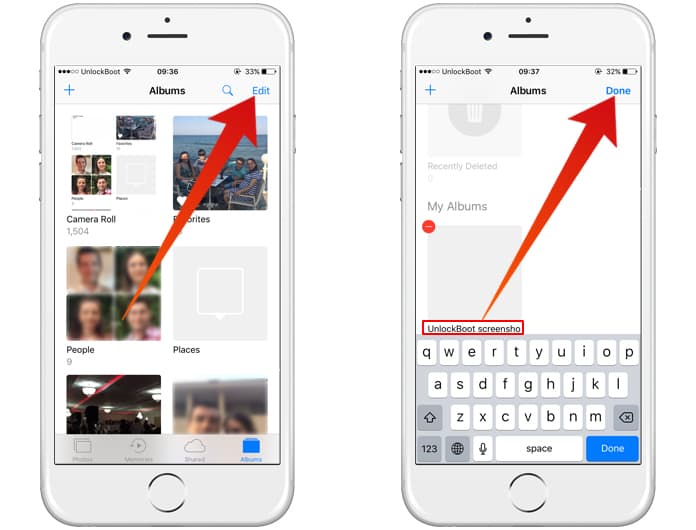
Step 2: Here you will see Edit option in the top right corner of the screen. Click on it.
Step 3: Now under every photo album, you will see its name. You will have to click on the album name i.e. name text, and you will be able to enter the new name.

Tap edit to rename album on iPhone or iPad
Step 4: After renaming the album, click on the Done button which is located in the top right corner.
Step 5: You are all done! By following this method, you can quickly rename your photo albums on iPhone and iPad.
How to Create New Photo Album on iPhone or iPad
Creating a new photo album on iPhone or iPad can be done easily by following the steps below:
Step 1: Open the Photos App on your iDevice.
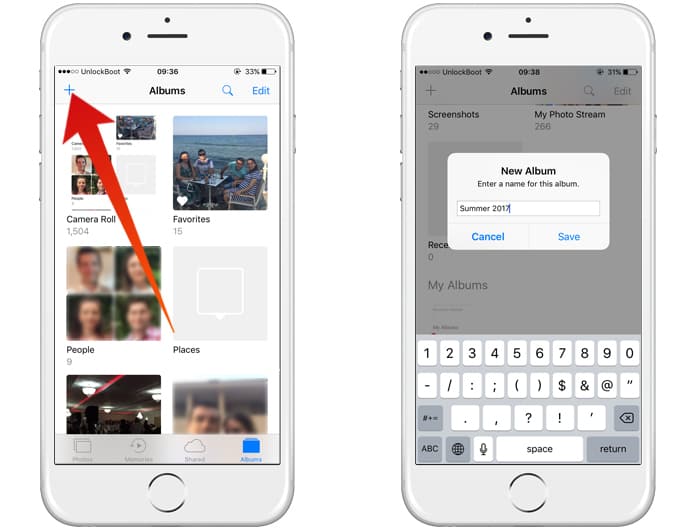
Step 2: Tap on the “+” button located on the left top corner.

Create a new Photos Album on iPhone
Step 3: Enter the name of the album and tap Save.
How to Add Photos in your Photo Albums
Adding photos to your Photo albums can be easily done on your iPhone and iPad. Follow the steps below to easily move your photos to other photo albums:
Step 1: Open the Photos app and navigate to the source folder.
Step 2: Tap on the “Select” button from the top right corner and select the images you want to move.
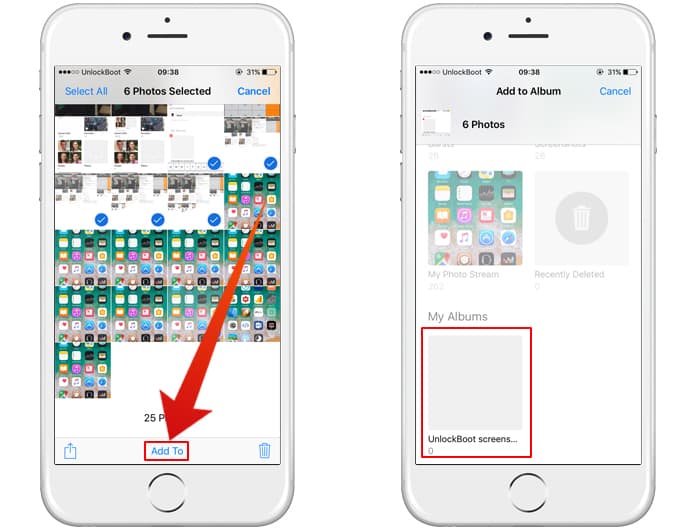
Step 3: Now tap on the “Add to” button to move your images to the new folder.

Move Photos to your renamed folder on iPad or iPhone
Step 4: Select the new folder/location and the photos will be moved to this folder.
Read Also: How to Print Photos from iPhone or iPad
You’re done. By following this tutorial you can easily manage your photo albums and photos on your iDevice. If you have any questions, ask us in the comments below.


![30 Best Cydia Repo Sources For iOS 16/15/14 Jailbreak [2024] best cydia sources 2020](https://cdn.unlockboot.com/wp-content/uploads/2020/06/cydia-sources-13-100x70.jpg)