For those who don’t know, the Galaxy S7 has two versions, the Samsung developed Exynos and Snapdragon by Qualcomm. Both of them have their differences but the most important one is that Exynos is easy to root whereas Snapdragon poses more of a challenge. However, that doesn’t mean that it isn’t possible to root Samsung Galaxy S7 which has Snapdragon.

Our method to do root won’t give the exact same functionalities as the Exynos version but it will allow you to perform actions like install Xposed to vary stock ROM and run optimizing scripts as well remove bloatware from your device.
What do you Need to Root Galaxy S7 or S7 Edge
- Make sure to keep a backup of your phone since everything will be deleted.
- A PC with Windows installed is a must.
- This method to root Galaxy S7 will grant root access but won’t allow flashing custom ROMs or recoveries. Attempting to do so will damage the phone.
- Ensure Secure Boot is disabled, from Settings -> Lock Screen.
1. Setting up the USB Drivers and ADB
Step 1: Download and install the respective Samsung drivers.
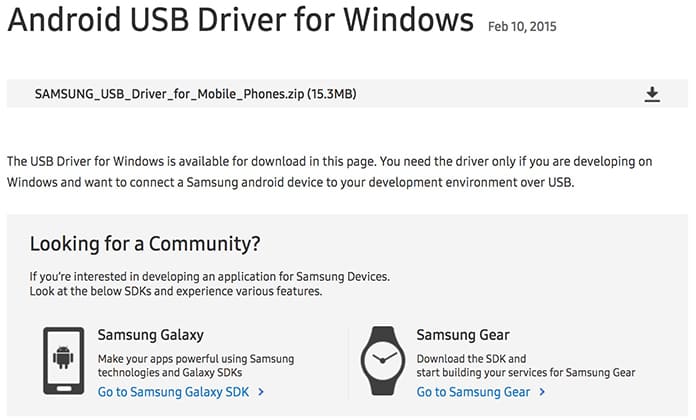
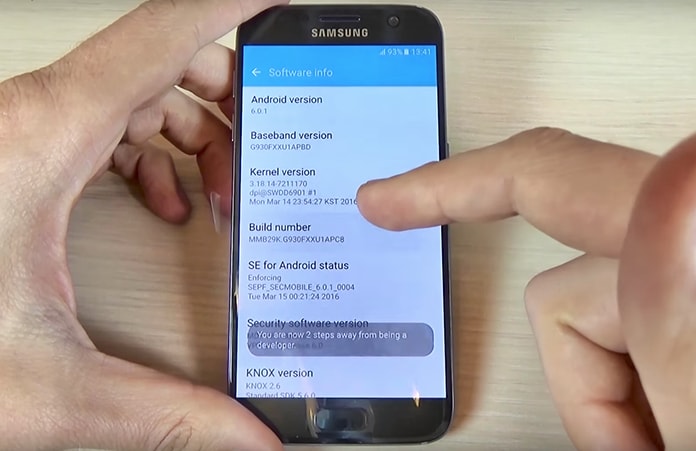
Step 2: Go to Settings -> About Phone and tap on build number till it shows you as a developer.
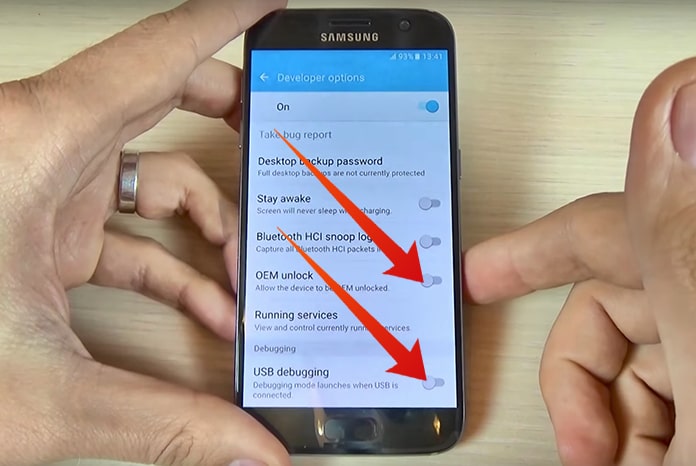
Step 3: Return to the previous menu and select Developer Options and select USB Debugging.
Step 4: Connect the device to the PC using a USB and install ADB. It should complete in about 30 seconds.
2. Flash Rooted Boot Image using Odin
Step 1: To continue the process to root Samsung Galaxy S7, download Odin and save it to your desktop.
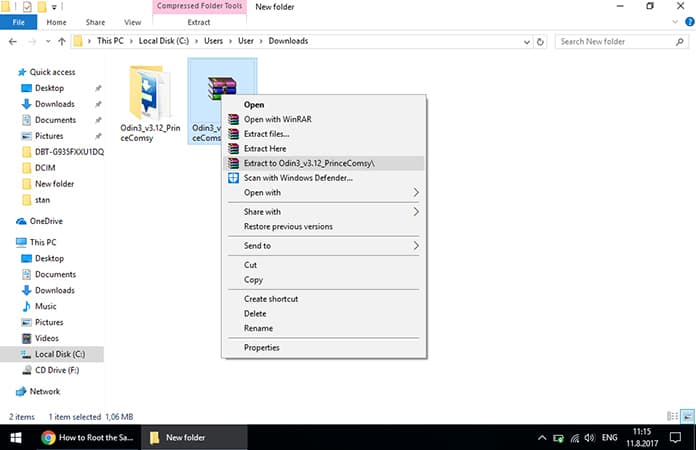
Step 2: Next, download the rooted boot image for your phone and save that to desktop. Keep in mind that if it is already in .tar format don’t extract it, just save it as it is. Download link for Samsung Galaxy S7 and Samsung Galaxy S7 Edge.
Step 3: Otherwise extract and then launch Odin.
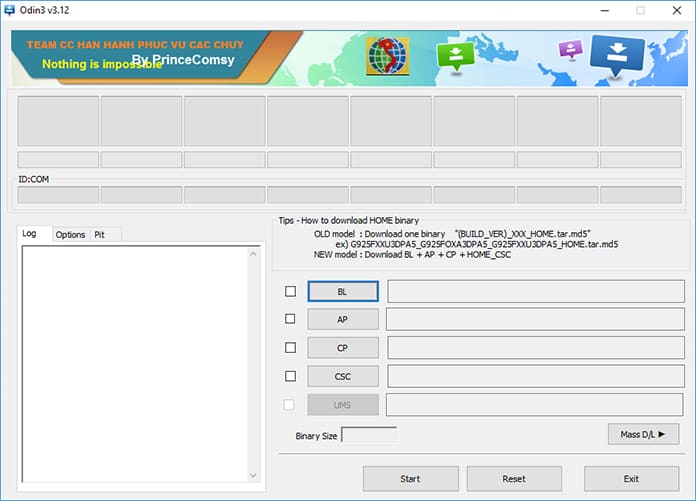
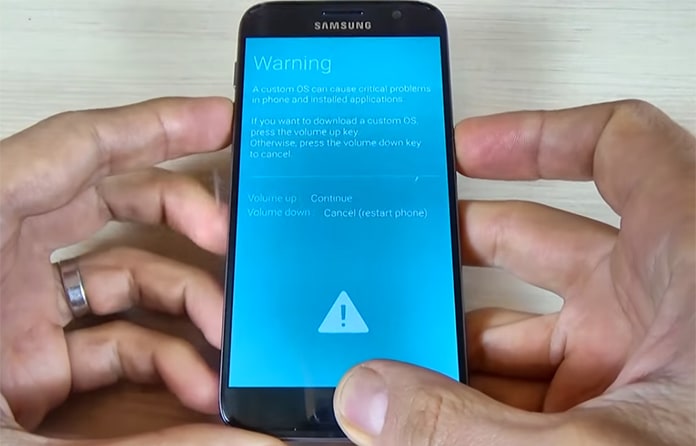
Step 4: Restart the phone by pressing the Volume Down, Power and Home buttons simultaneously until you see the Download Mode.
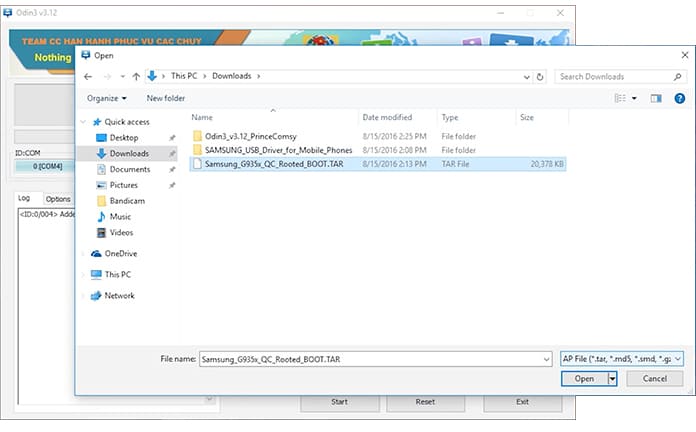
Step 5: Click on AP and select the downloaded .tar file.
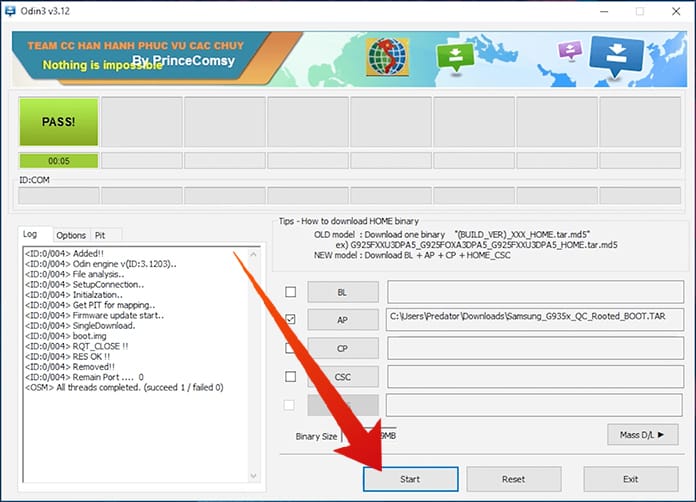
Step 6: Select the Start option and wait for the phone to flash and reboot.
3. Installing SuperSU
Step 1: The next step to root Samsung Galaxy S7 is downloading the SuperSU Installer.
Step 2: After the download completes, extract it.
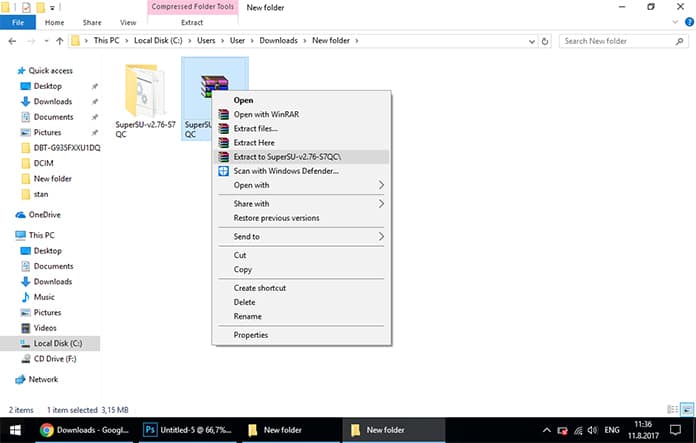
Step 3: While making sure the phone is connected to the PC, double click on the root.bat file and wait for the phone to flash.
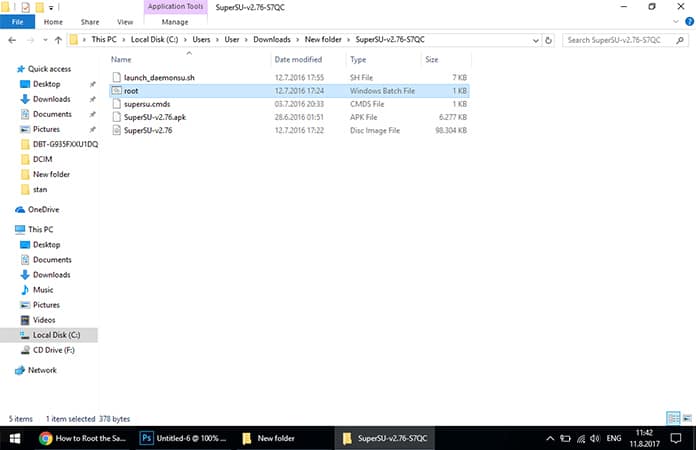
Once this is done, open SuperSU using your device and ensure you Ignore its prompts to update the binaries.
Read Also: How to Unlock Samsung Galaxy S8
If you followed all these steps correctly, congratulations are in order; you have successfully managed to root Samsung Galaxy S7 or S7 Edge. My first advice for you would be to use the debloater and run the optimizer scripts to clean out your phone. Enjoy!
![Samsung Galaxy S25/S25+/S25 Ultra FRP Removal Service [Permanent] galaxy s25 frp removal](https://cdn.unlockboot.com/wp-content/uploads/2025/02/s25-frp-removal-324x160.jpg)

![Samsung Galaxy A13 FRP Removal Service [INSTANT] galaxy a13 frp removal service](https://cdn.unlockboot.com/wp-content/uploads/2024/10/unlock-galaxy-a13-5g-324x160.jpg)


![30 Best Cydia Repo Sources For iOS 16/15/14 Jailbreak [2024] best cydia sources 2020](https://cdn.unlockboot.com/wp-content/uploads/2020/06/cydia-sources-13-100x70.jpg)