Ever wondered how to save voicemails from your iPhone? Well to me, listening to voicemails is one of the most unpleasant of task. I delay it as long as I can and by the time I end up listening to them I find they have been deleted. However, there are those that I would like to listen to again and again like birthday wishes from my loved ones or just a joke sent by a friend.

Voicemails that you treasure and would like to save are best stored in your computer. The problem, however, is that for iPhone users it is not a very simple task. There are apps like iExplorer and PhoneView to aid you. But why spend money on just transferring your voicemails?
So let me help you save your money. I will show you how to save all your voicemails from your iPhone onto your computer. Using just a few Terminal commands you will be able to convert your voicemails in to shareable files.
It might sound daunting at first but as long as you follow these simple steps you will have no problem at all.
BackUp your iPhone
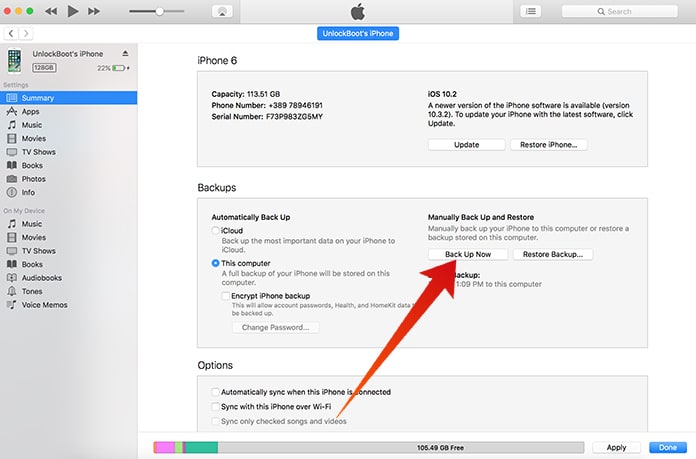
Create backup to save voicemails from iPhone
To save voicemails from your iPhone, the first step is to backup your iPhone using iTunes and not iCloud. Open iTunes while your iPhone is connected to your computer. Click on Backup Now showing on your iPhone’s Summary page. Skip to Step 2 for voicemails that are saved in an earlier backup.
Find the Backup Folder to Save Voicemails from iPhone
In order to find the backup folder where you have saved your voicemails, open Finder. Your will need to press and hold down the Option key. Click Go in the menu bar. Then select Library. From there go to Application Support -> MobilSync -> Backup. The Backup folder contains all of your iTunes backups. Switch to List View because it will show you the date of each backup too. This will help you differentiate between your recent and earlier backups.
Copy And Rename The Backup Folder, Create iOS Voicemails Folder
If you want to avoid mistakenly deleting your backup, you can easily copy the folder and paste it on to your desktop. In order to do that simple right-click on the backup folder and select Copy “Backup Folder Name”. Right-click on the empty space on your desktop and paste the item. It might take a few seconds because backups are usually large.
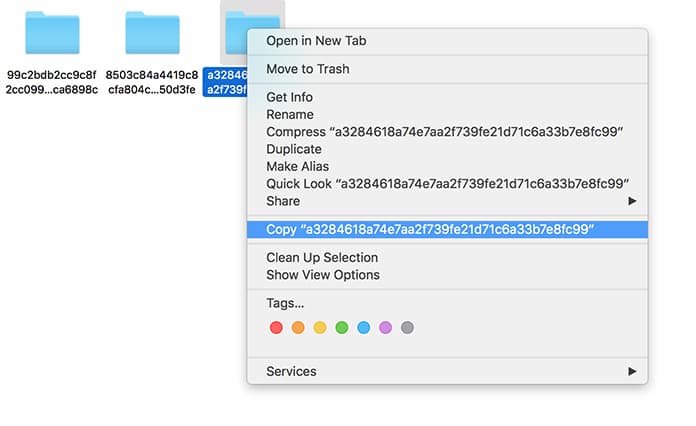
Copy Backup folder to Extract voicemails on Mac
Now you have the option to rename it too. Instead of keeping the confusing numbers and letters you can simply name the folder iOSBackup. In order to do that right-click on the folder, select Get info and enter a name of your choice in the Name & Extensions box.
Similarly, create a separate folder called iOSVoicemails for all your saved voicemails from your iPhone.
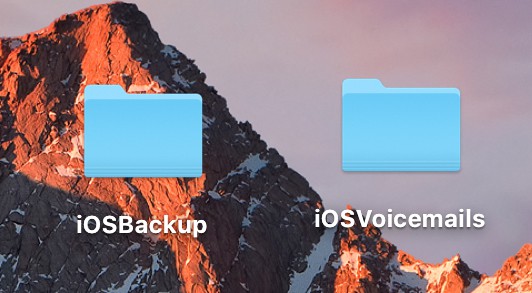
Backup and Voicemails folders on Desktop
We used to have much more complicated way of extracting your voicemails from backups. However, we are most grateful to WonderHowTo user Lauren Pattison who has created a much simpler procedure. She has even shared the script with us.
Open Terminal and enter the following:
cd Desktop
Press enter. This will set the directory. Create the script by entering:
vim voicemailscript.sh
Press enter and type the following:
i
It will now allow you to enter text. Type the following text into Terminal including indentations and all. Instead of typing everything you can even copy it here from the file on Pastebin and simply paste onto Terminal.
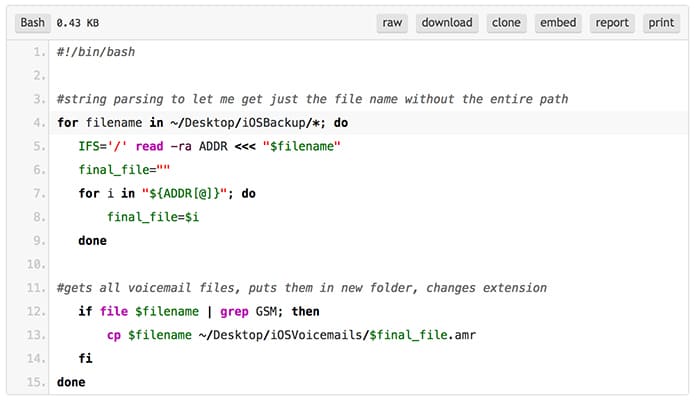
Script to download voicemails from iPhone
Once you have pasted the text, press Escape and type:
:wq
Press enter.
Make the Script Executable and Run it
In the Terminal type:
chmod a=T+W+X voicemailscript.sh
Press enter and it will make your script executable. Then type:
./voicemailscript.sh
Press enter and that will run the script for you.
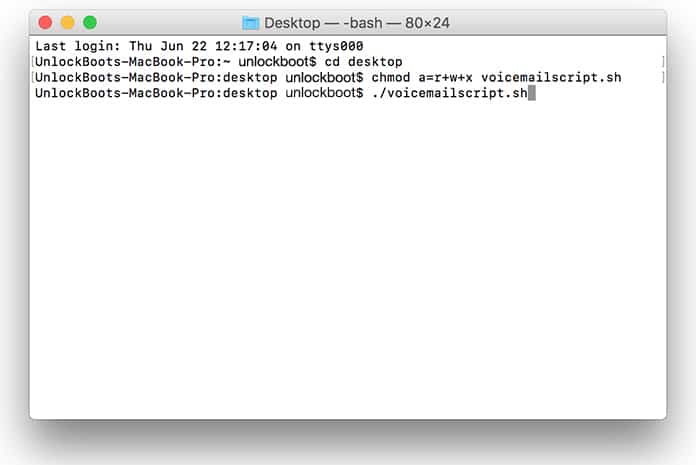
Extract and Save Voicemails from iPhone to Mac
You will be able to view a list of all your voicemails in the Terminal.
Listen To Voicemails, Convert Them To .mp4a format
Open the iOSVoicemails folder on your desktop. Select the voicemails you want to listen or converted. Open them in Quicktime Player, go to File, scroll down to Export and select Audio Only. Press Save and you will save voicemails from your iPhone in an .mp4a format that you will be able to share or upload as you desire.
Follow these tips to save voicemails to your iPhone.


![30 Best Cydia Repo Sources For iOS 16/15/14 Jailbreak [2024] best cydia sources 2020](https://cdn.unlockboot.com/wp-content/uploads/2020/06/cydia-sources-13-100x70.jpg)